Building partnerships through collaboration.
Use Document Search
Use Document Search to find your documents in ShopBlue.
Use Document Search
Use Document Search [4:42]
1. Click Search Documents
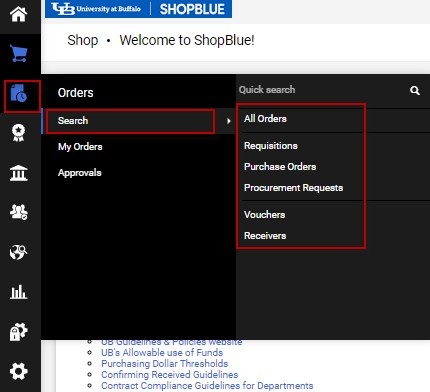
To find a certain document, you can use the Document Search in ShopBlue. Start first by clicking the “Documents” icon on the left side of your homepage. Next, select the type of documents you are searching for (Figure 1).
2. Enter Search Terms
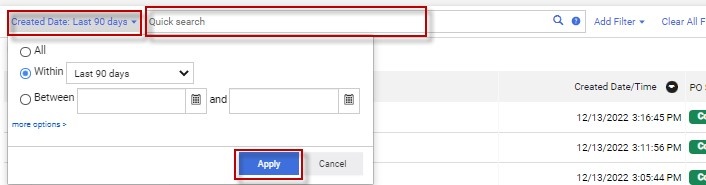
Click on “Created Date: Last 90 days” dropdown to select the range of dates or enter a custom range of dates, or enter a custom range of dates then click “Apply” (Figure 2). Now, you can enter your search term (PO number, supplier name, etc.).
3. Click PO No. to View
Next, click on the PO Number you wish to view (this search was for Purchase Orders from Corr Distributors over the last 90 days) (Figure 3).

You can refine your search results by using any of the filters on the left-hand side of your screen (Figure 3) or by clicking "Add Filter” and choose from the drop down (Figure 4).

Save Searches as Favorites
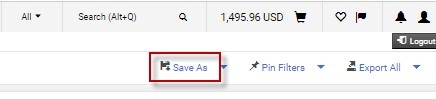
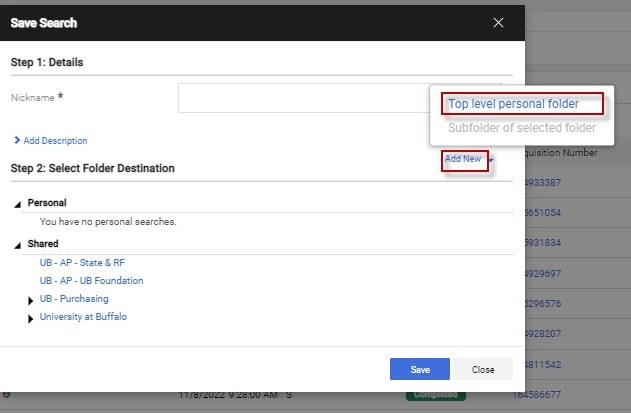
Continuing from the previous example, click on “Save As” (Figure 5). This will bring up a box where you will be able to give your search a Nickname and Add Description (Figure 6).
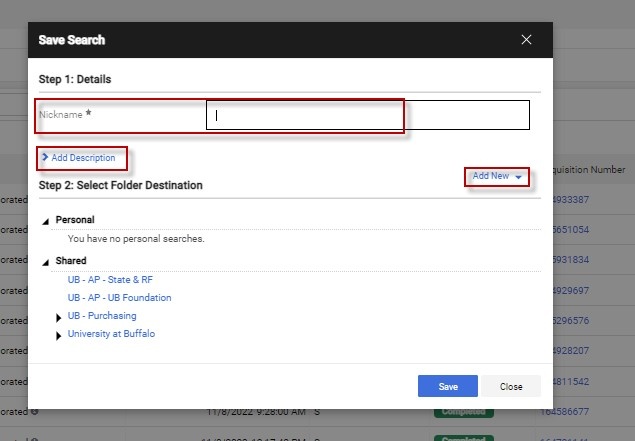
Note: if you do not have a folder under your Personal Favorites, you will need to create one by clicking “Add New”.
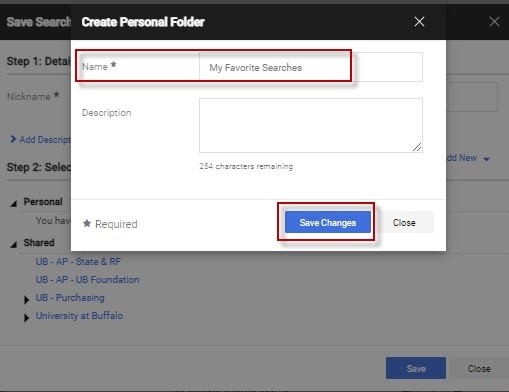
Create and name a Personal Folder for your saved searches (Figures 7 and 8).
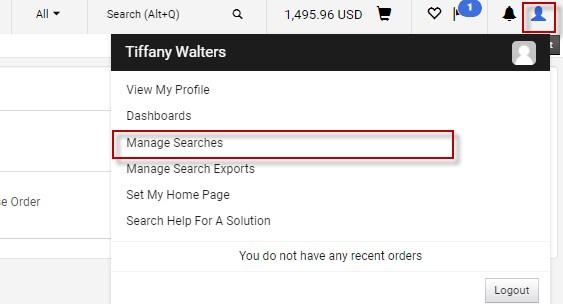
Retrieve a Saved Search
Click the Person icon on the right-hand side. Then click on “Manage Searches” (Figure 9).
From there, click on your saved folder under Personal, and click “Go” on the right-hand side (Figure 10).
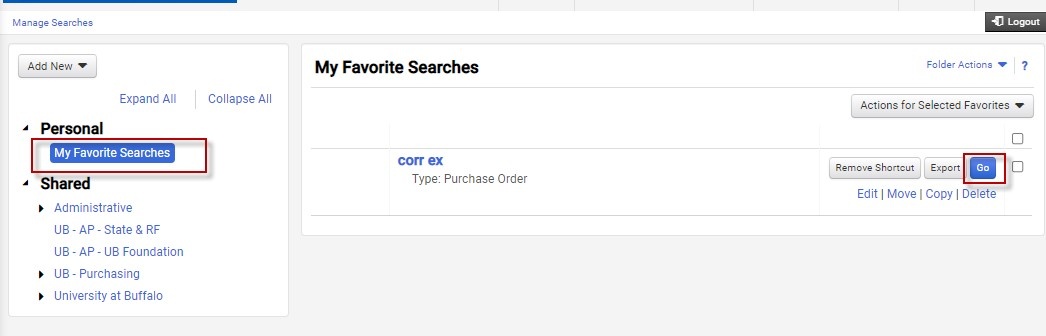
Figure 10
Exporting a Search to Microsoft Excel
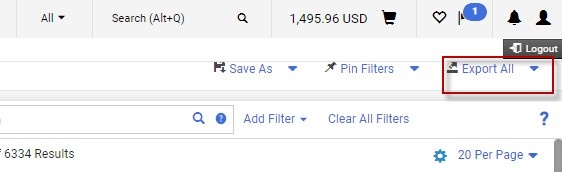
Continuing from the previous example, in order to export your POs from the last 90 days, first, select the “Export All” drop down arrow (Figure 11).
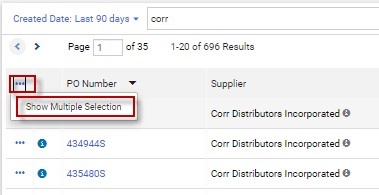
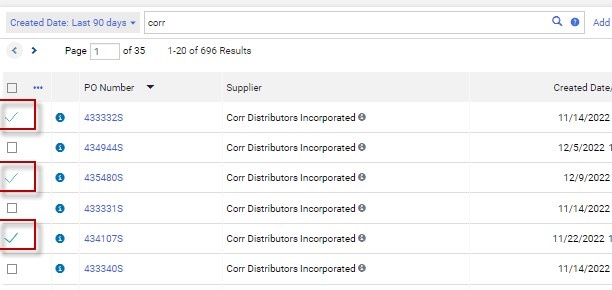
Note: if you only wanted to export only some of the rows from your search, click the Three Dots in the gray bar and click on "Show Multiple Selection" (Figure 12). This will bring up a column of boxes. Select the boxes in the rows you wish to export. The boxes will then turn into a Checkmark (Figure 13). At the “Export All” drop down arrow select “Export Selected Rows”.
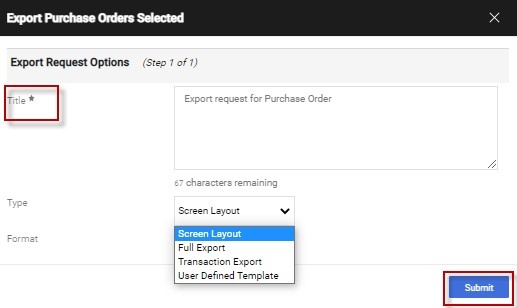
Give your export a name and choose the type of Export Template (Figure 14).
- Screen Export – Exports only the information available in the search results screen for each document.
- Transaction Export – Exports an expanded set of information on the documents.
- Full Export – Exports transactions with history.
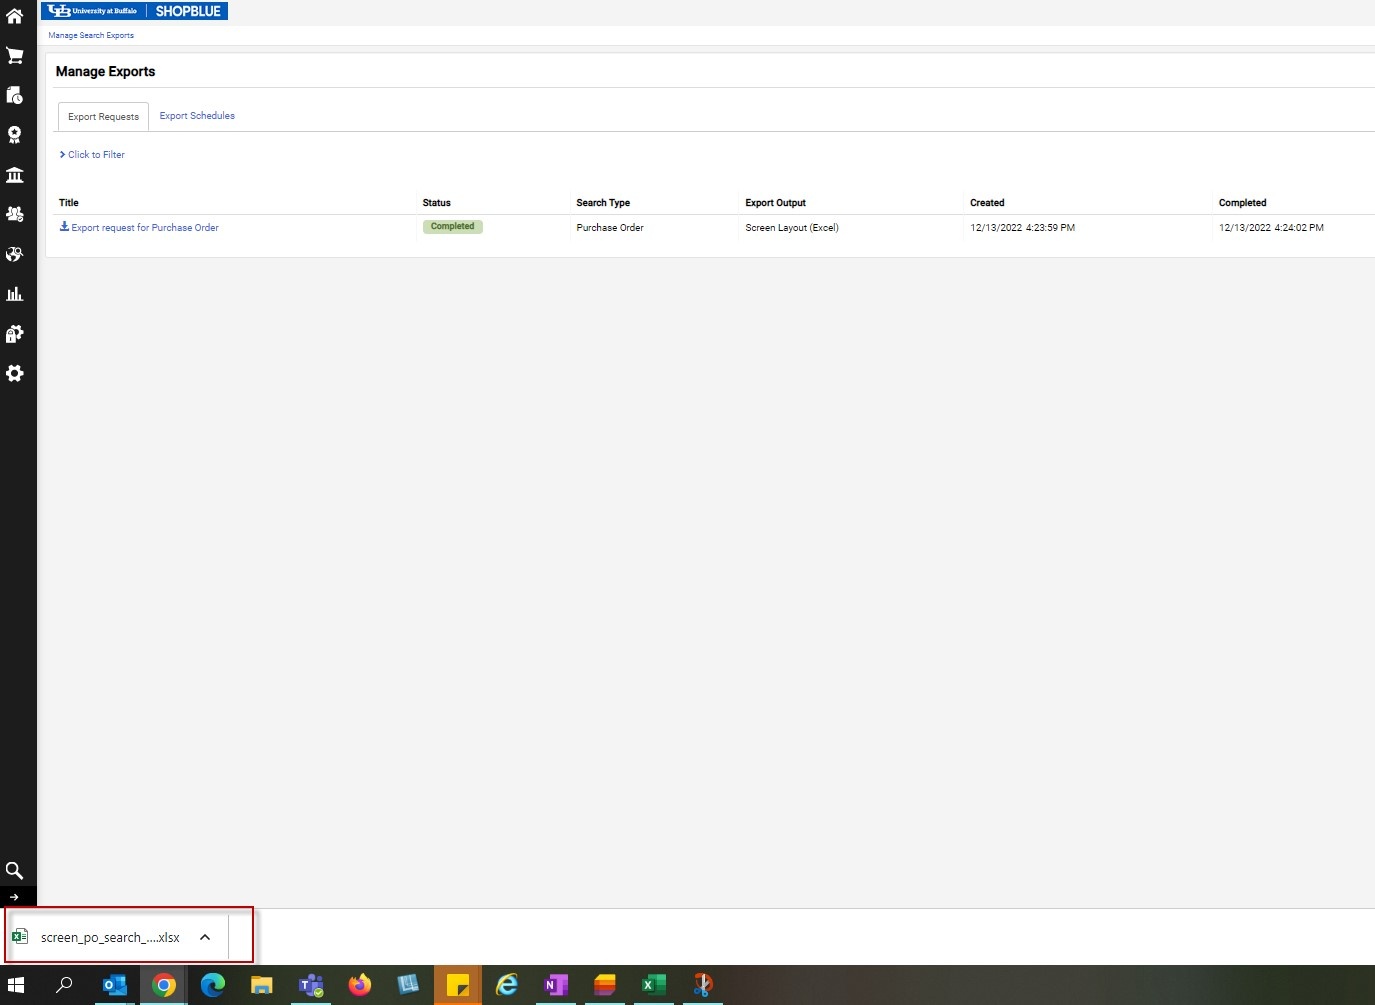
Next, click "Manage Search Exports” (Figure 15). Then, click on the title you wish to download the exported search results (Figure 16). The file will appear as an Excel spreadsheet at the bottom of the page or in your computer's Downloads folder (Figure 17).
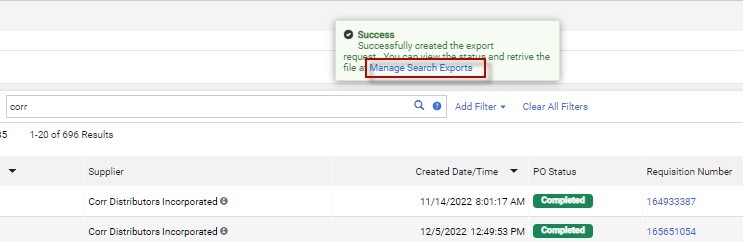
Figure 15

You can also find your saved exports by going to the Person icon. Then “Manage Search Exports” (Figure 18).
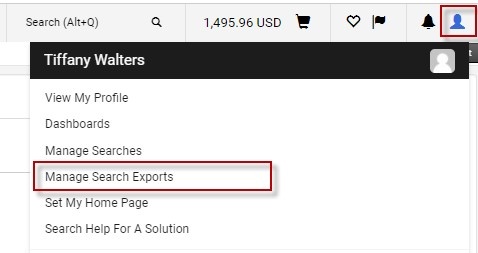
Figure 18
Need help or have questions?
Visit our Business Services Support Hub to submit and track requests and access helpful resources.