Building partnerships through collaboration.
Splitting Account Codes by Line
When checking out, you can enter multiple account codes by line item.
How to Split Account Codes by Line
Split Account Codes by Line [2:36]
1. Checkout
When you have completed shopping and are ready to checkout, proceed to checkout from your shopping cart (Figure 1).

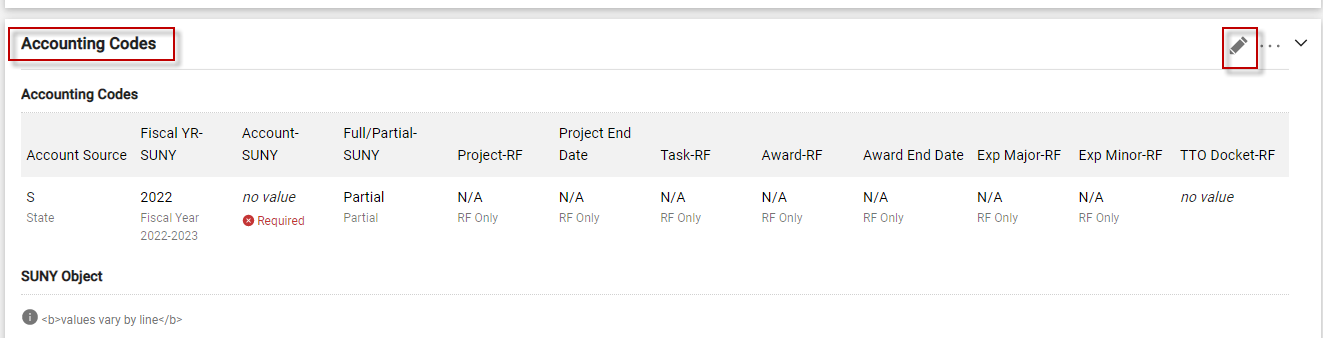
2. Access Accounting Codes
In the Summary tab, scroll down to the Accounting Codes section. Select the Pencil icon to input the account that will be mainly used for the order (Figure 2).
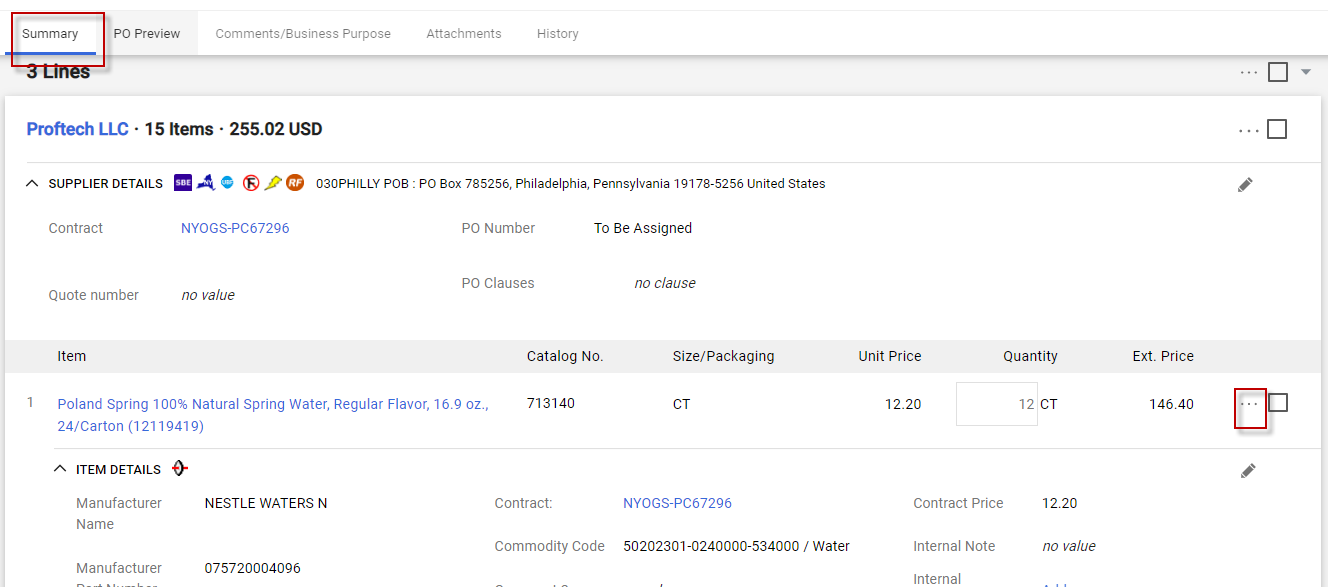
3. Access Accounting Codes by Item Line
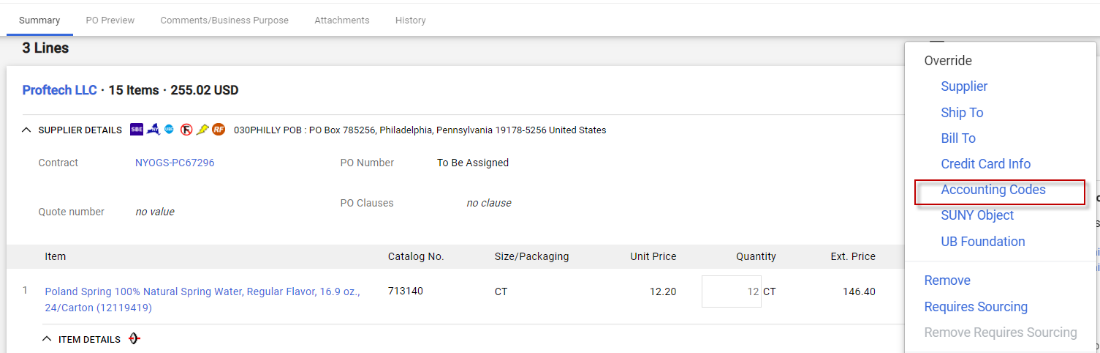
Scroll down to the list of items. On the item line that requires a different accounting code, click on the Three Dots (Figure 3). Then, select Accounting Codes to change the accounting codes for that corresponding line (Figure 4).
Note: the accounting codes for each line will automatically default to be the same as accounting codes on the header of the requisition.
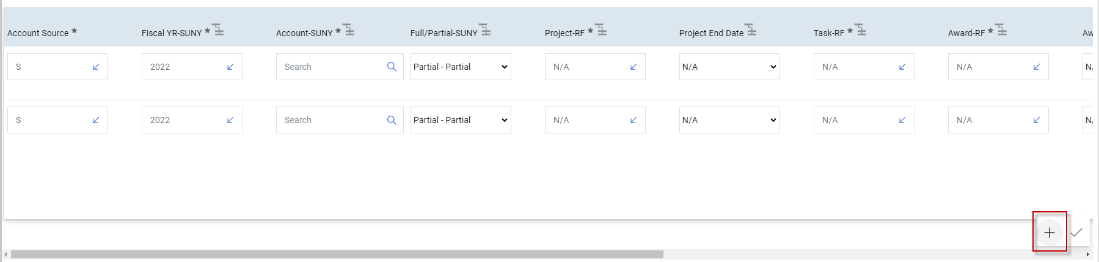
4. Enter the Accounting Code
Once in accounting codes, enter the appropriate accounting code and information for that line by inputting the account (Figure 5).
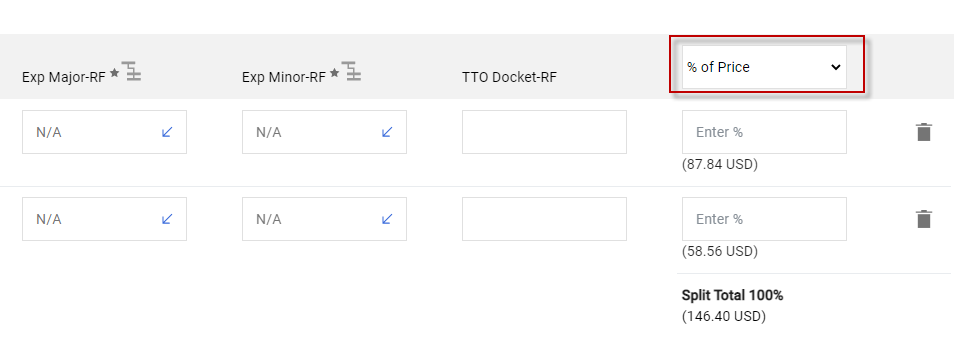
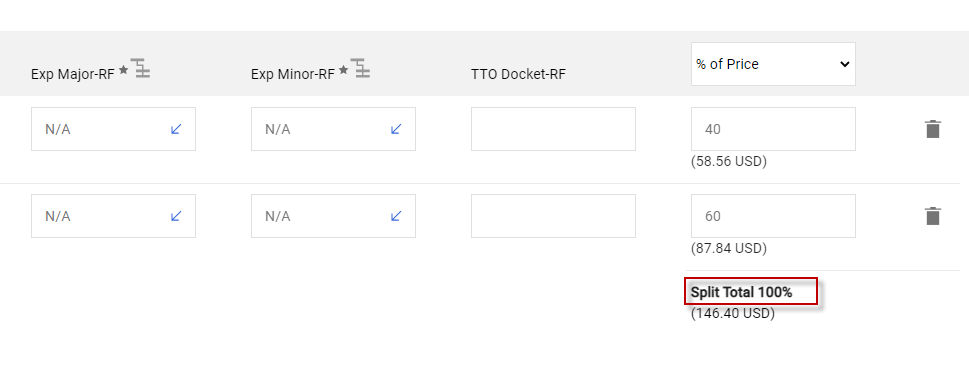
Note: to add more than one accounting code to a single line, select the plus sign. Then, enter additional accounting codes as desired (Figure 6). Move the taskbar all the way to the right and select the appropriate way this line should be split “% of Price” or “% of quantity”. Then input the distribution value (Figure 7 and 8). For additional steps please reference Splitting Account Codes by Purchase Requisition tip sheet.

5. Save
When you have completed entering the accounting codes, select Save (Figure 9).

After you have edited the accounting codes for each line, the header accounting code will be removed (Figure 10). The updated accounting codes will appear on the corresponding lines (Figure 11 and 12).
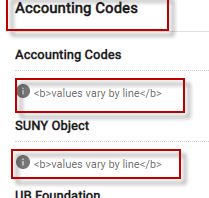
Figure 10

Figure 11
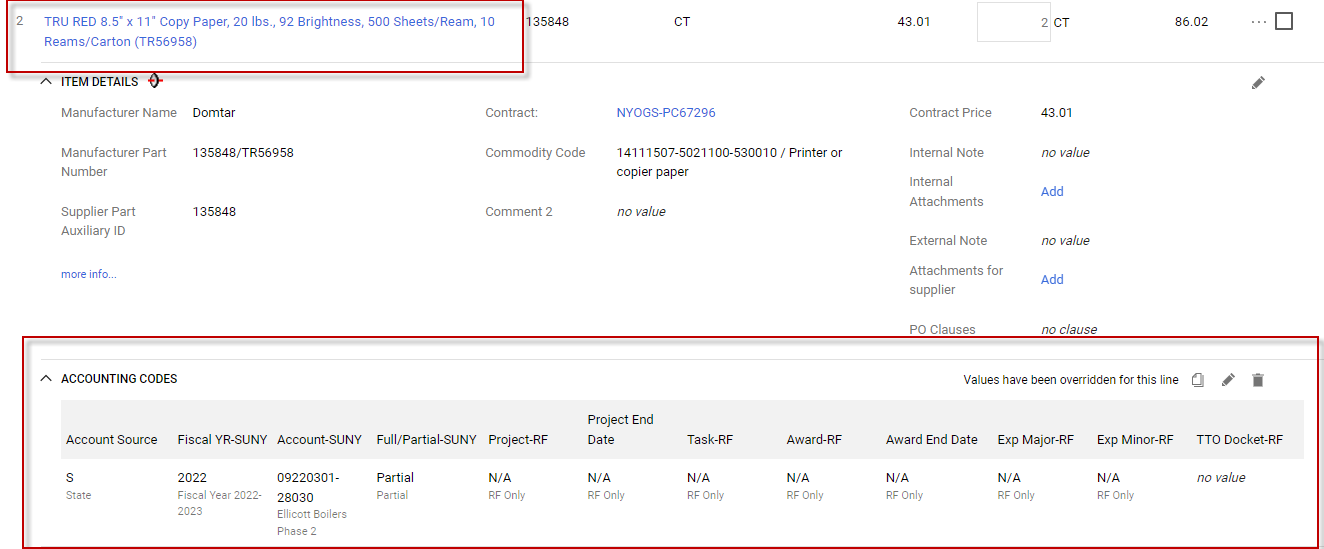
Figure 12
Need help or have questions?
Visit our Business Services Support Hub to submit and track requests and access helpful resources.