Building partnerships through collaboration.
Payment Request Form
In ShopBlue, submit a payment request form for payment of goods or services received without an existing requisition or purchase order.
How to Submit a Payment Request Form
Payment Request Form [3:32]
1. Click Payment Request
On the shopping page of ShopBlue, in the “Showcases” widget select “Payment Request” (Figure 1).

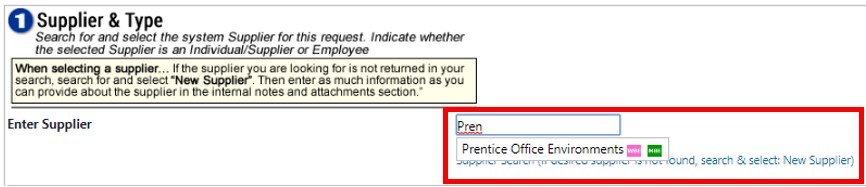
2. Enter Supplier Name
The payment request form is an external form from ShopBlue. Begin completing the form by selecting a supplier first. Enter the supplier name in the field (Figure 2).
Note: if the supplier is not in the system, enter and select “New Supplier”.
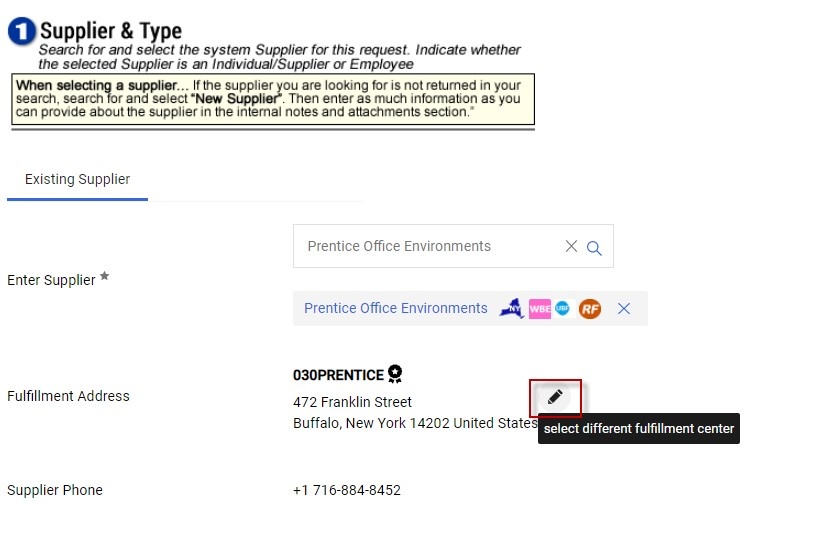
3. Select Fulfillment Center
The correct fulfillment center will need to be selected depending on the funding source. Click “Select different fulfillment center” to edit. On the pop up screen, select the appropriate fulfillment center (Figure 3).
Note: fulfillment centers beginning with “030” are for RF funds; fulfillment centers beginning with “S” are for state.
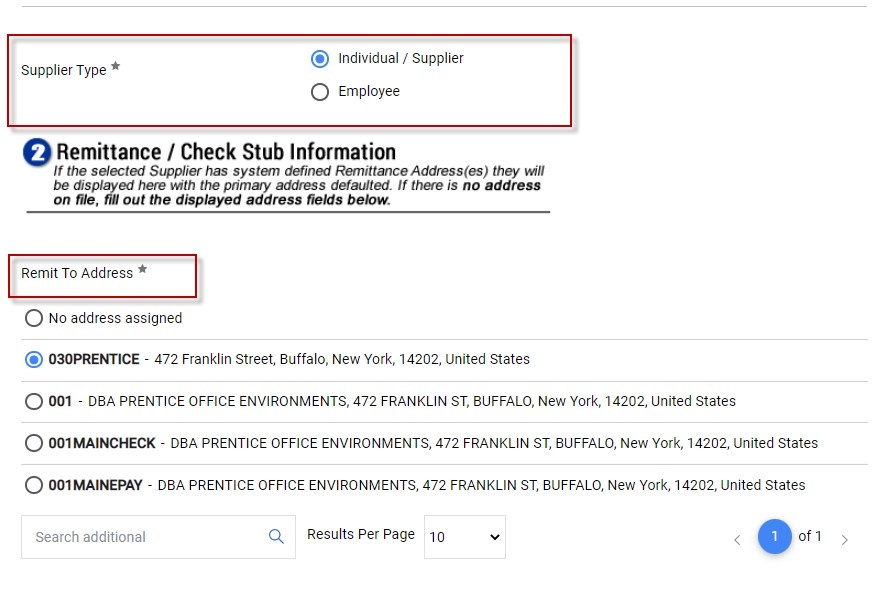
4. Select Supplier Type and Remit To Address
In section 2, select “Individual/Supplier” for supplier type. The Remittance/Check Stub Information will automatically populate based on the selected suppliers defaulted addresses. If the supplier has more than one remit to location, you can select override the default by selecting the appropriate address from the drop-down menu. If they do not have an address on file, users will be required to complete the address fields (Figure 4).
Note: if entering a New Supplier please bypass the Remit to Address step.
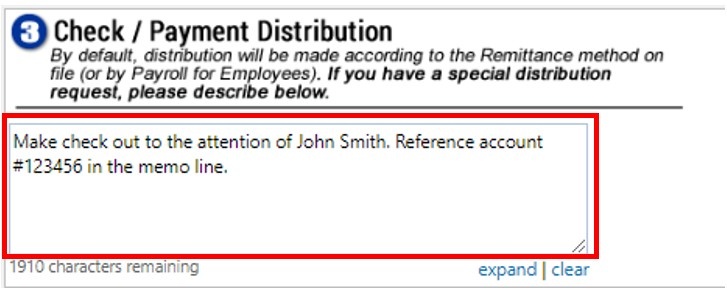
5. Enter Special Distribution Requests
Any special instructions regarding payment can be requested in the “Check/Payment Distribution” section (Figure 5).
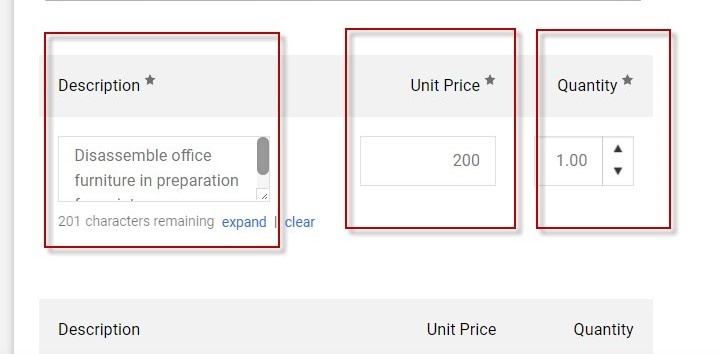
6. Enter Description of Goods or Services
In section 4, enter a Description of the goods or services, the Unit Price and Quantity (Figure 6).
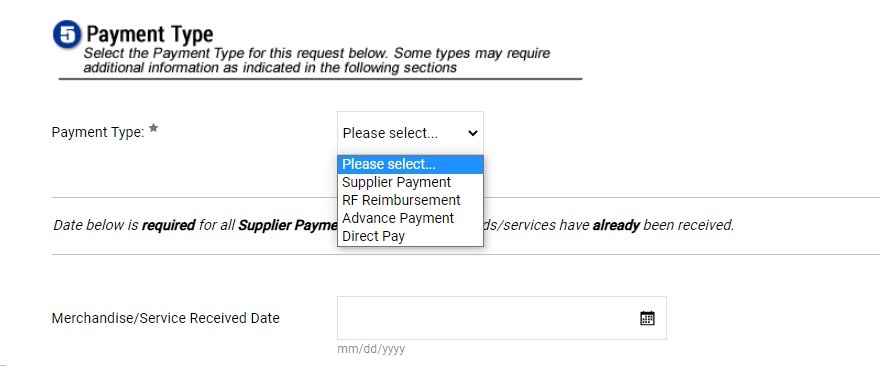
7. Select Payment Type
In section 5, on the top of the page, select the appropriate Payment Type from the drop-down menu. If the goods/services have already been received, enter Merchandise/ Service Received Date (Figure 7).
8. Enter Invoice Number and Date
In section 6, enter the Supplier Invoice Number and Invoice Date in the appropriate fields (Figure 8).
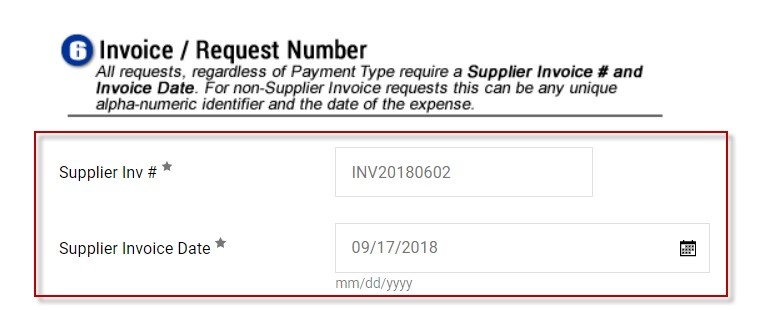
Figure 8
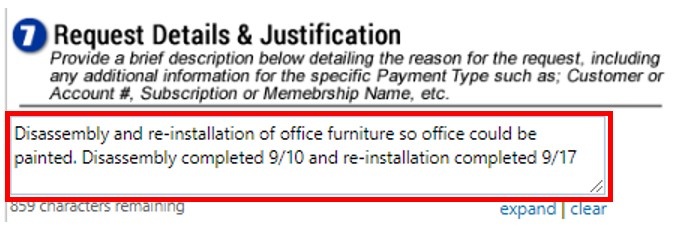
9. Enter Request Details and Justification
In section 7, enter the Details & Justification for the Payment Request (Figure 9).
10. Attach Supporting Documentation
In section 8, attach the supplier invoice or any other supporting documentation by selecting “Add Attachments”. The attachment name, size and date will appear after successfully attaching the document (Figure 10).

11. Affirm Agreement
In section 9, select the affirmation that you have read and agree to the terms of the request form (Figure 11).
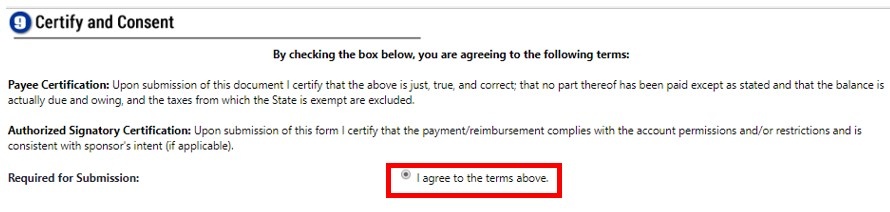
Figure 11
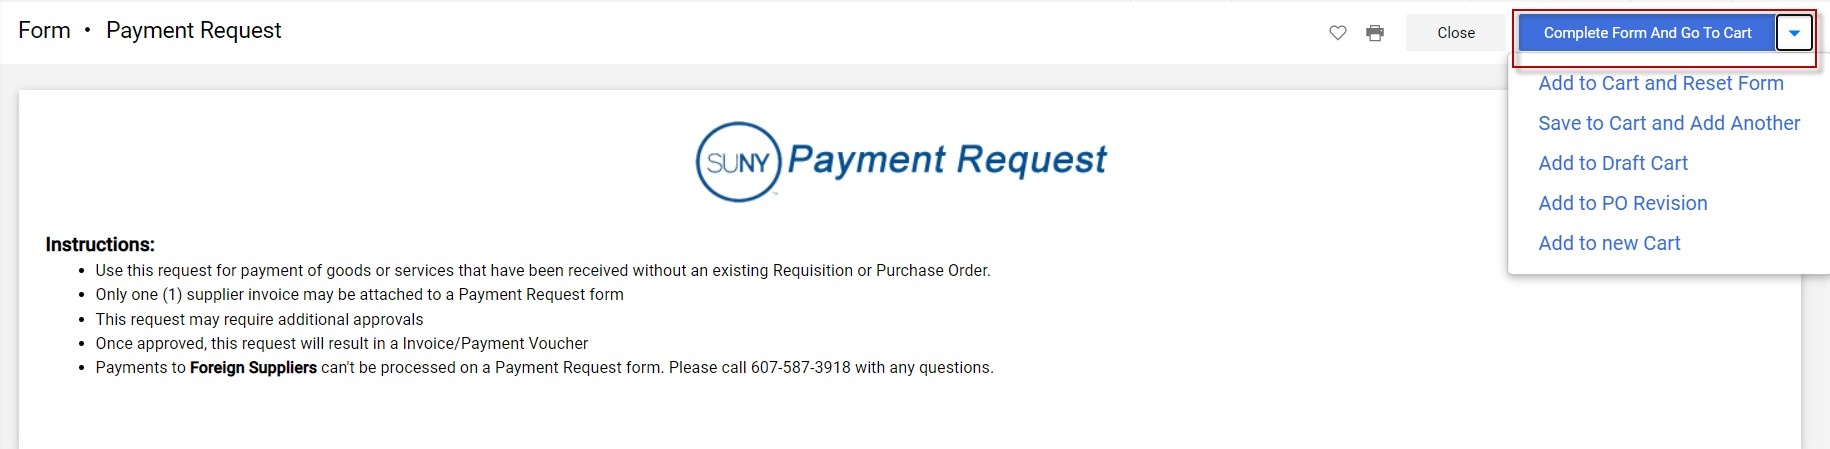
12. Complete Form and Go to Cart
Upon completing the Payment Request form, choose “Complete Form and Go to Cart” (Figure 12).
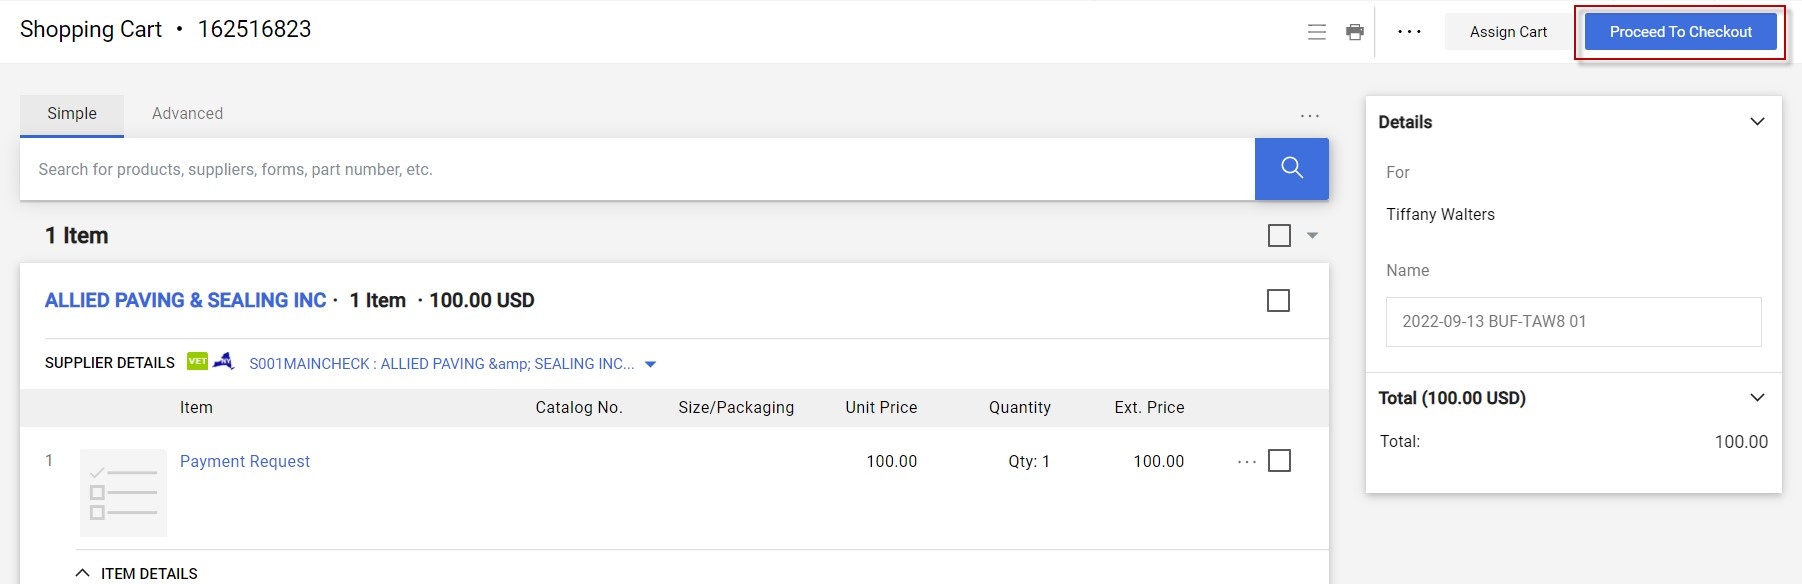
13. Proceed to Checkout
Once the Payment Request form is completed, it will be added to your cart as a line item. You can then “Proceed to Checkout” (Figure 13).
Need help or have questions?
Visit our Business Services Support Hub to submit and track requests and access helpful resources.