Building partnerships through collaboration.
Assign a Substitute Approver
In ShopBlue, you can assign substitute approvers to whom you may route your requisitions.
How to Assign a Substitute Approver
Assign a Substitute Approver [2:44]
1. Click Assign Substitute Approvers
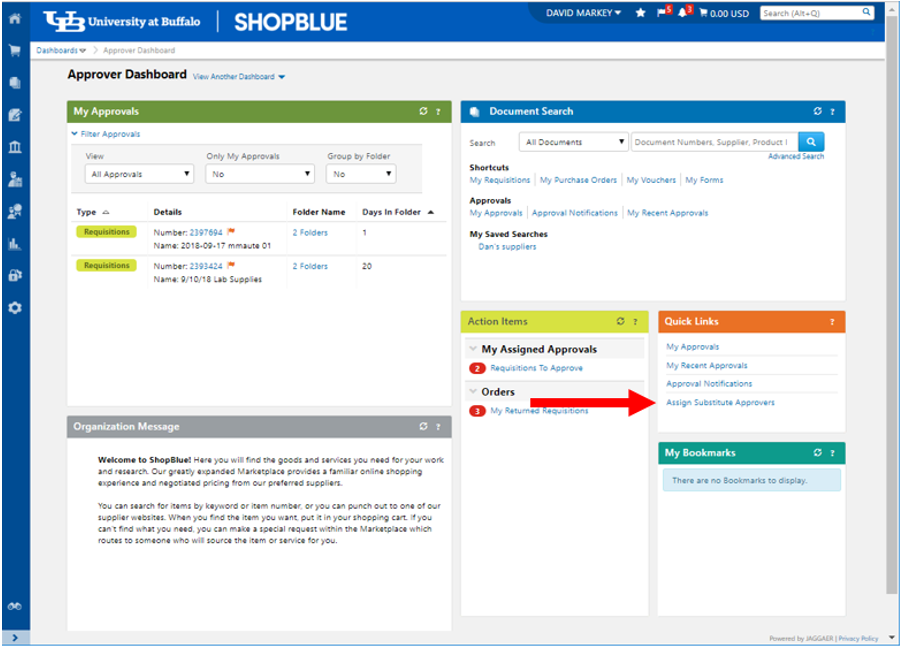
From the Approver Dashboard, click “Assign Substitute Approvers” in “Quick Links” (Figure 1).
2. Select Requisition
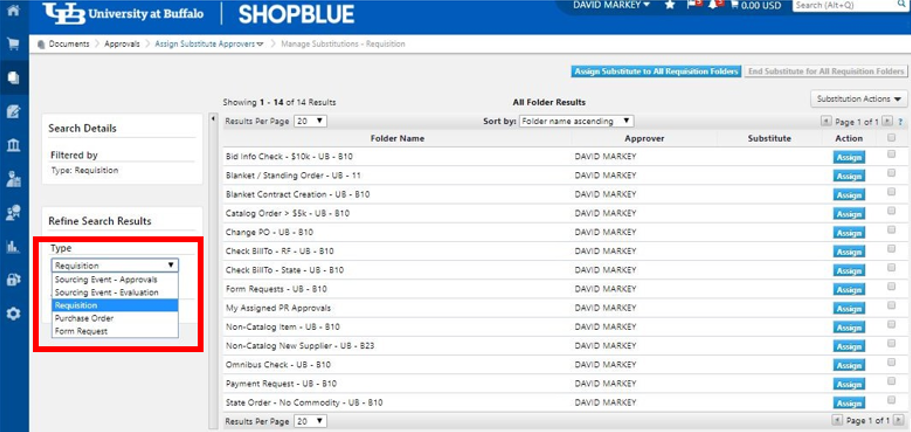
In “Type,” click the dropdown box and select “Requisition.” This will display several folders that you can either assign to an individual approver or to multiple approvers (Figure 2).
3. Assign Substitute to All Requisition Folders
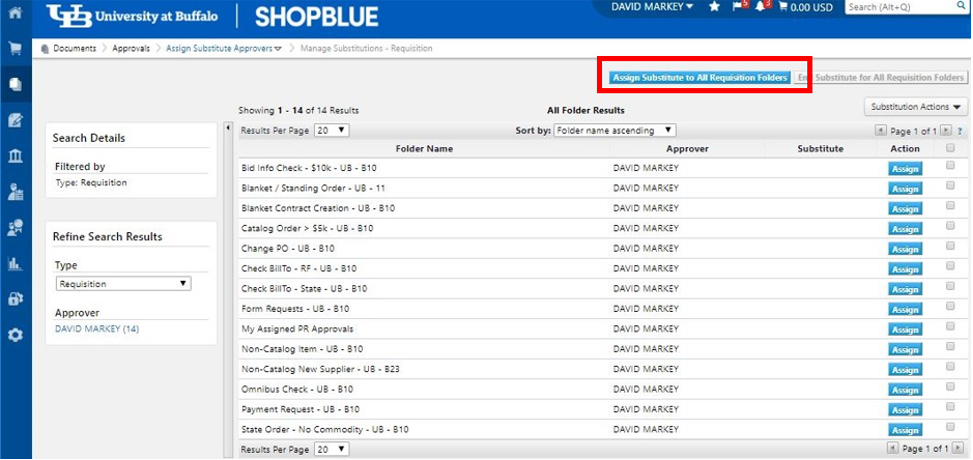
If you would like to assign all requisition folders to an individual approver, click “Assign Substitute to All Requisition Folders”. (Figure 3).
4. Assign Substitute to Selected Folders
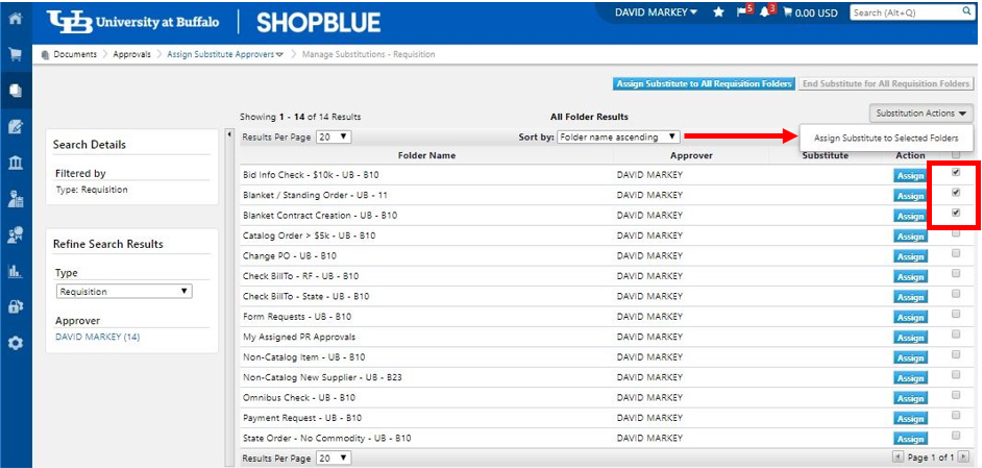
If you would like to assign specific folders to an individual approver, start by checking the boxes next to the folders you would like to share. Then, click the arrow next to “Substitute Actions” and select “Assign Substitute to Selected Folders.” Alternatively, to assign all but a few of the folders, you can “Assign Substitute to All Requisition Folders” and then uncheck the folders that you don’t want to assign a substitute for (Figure 4).
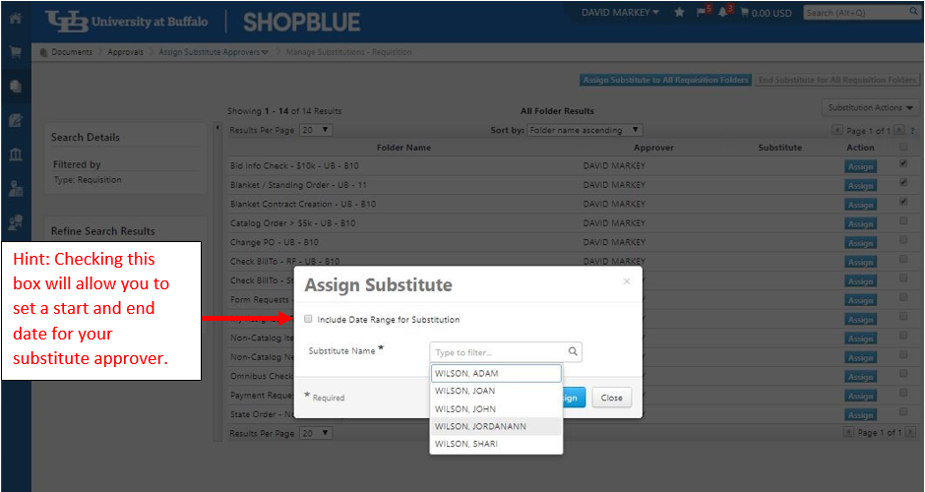
5. Select Substitute Approver's Name
Search for the last name of your substitute approver in the search bar and select their name from the dropdown (Figure 5).
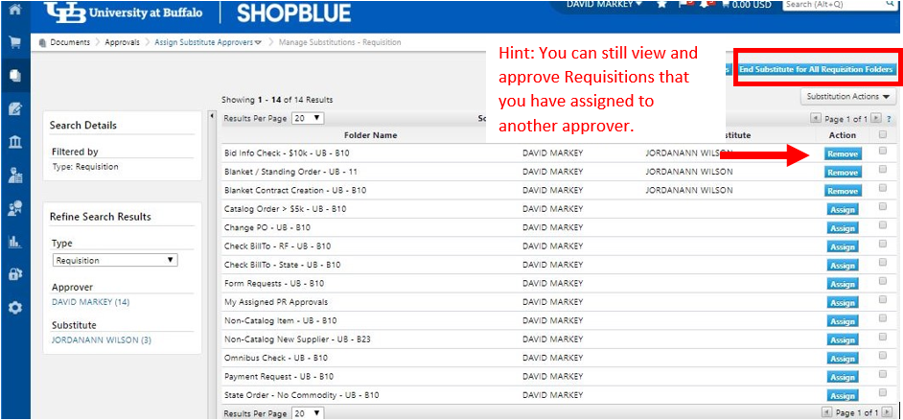
6. Remove Substitute Approvers
After your substitute approvers have successfully been assigned, requisitions will be routed accordingly until you remove the substitute approvers unless a time frame was entered. To remove your substitute approvers, click “End Substitute for All Requisition Folders” at the top right or individually remove approvers by clicking “Remove” next to each folder (Figure 6).
Need help or have questions?
Visit our Business Services Support Hub to submit and track requests and access helpful resources.