Building partnerships through collaboration.
Cart Management
There are many ways to view and access your cart in ShopBlue.
Cart Management
1. Click View Carts
View Your Carts [1:45]
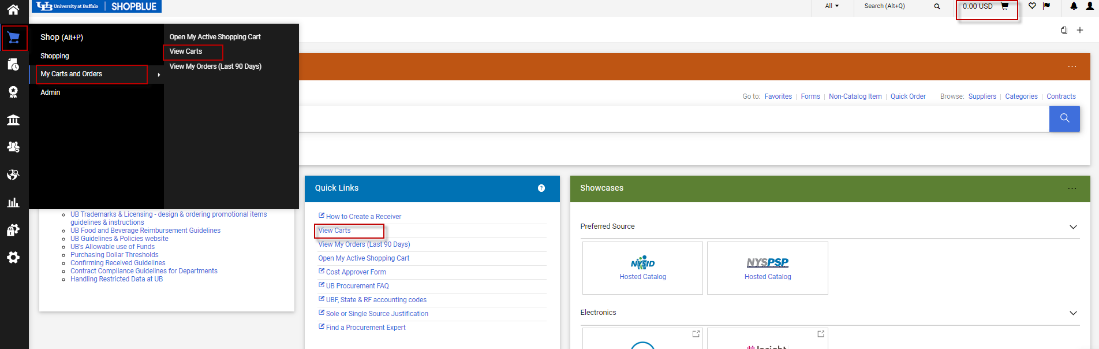
A powerful function of ShopBlue is the Shopping Cart system, which allows the user to perform different tasks. From the Shop home page there are several ways to view your carts, making it quite easy to access from anywhere in ShopBlue (Figure 1).
- On the left-hand side, you can use the the sidebarar navigation panto e click the Cart icon, My Carts and Orders then selecting View Carts.
- In the middle of the screen under Quick Links you can select View Carts.
- On the top right-hand side click the Amount USD Cart icon, this will bring you to your active cart.
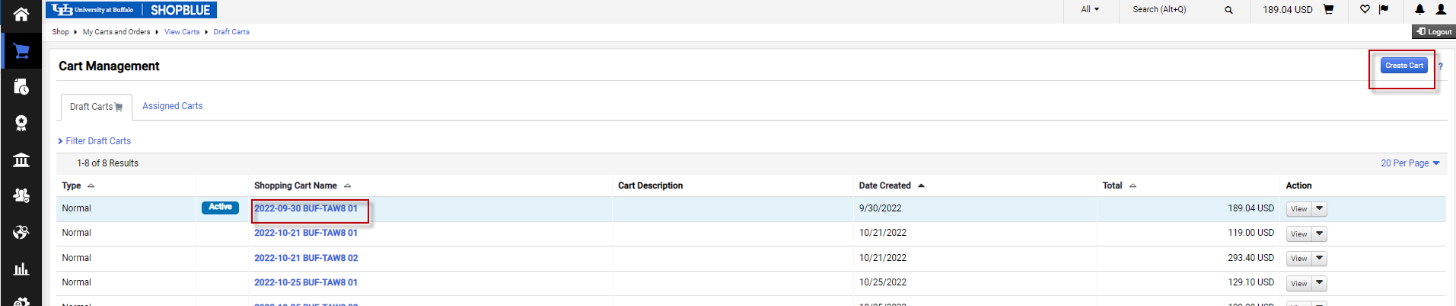
- Towards the bottom of the screen, under My Draft Carts you can also access a list of your draft carts (Figure 2).
Note: you can give your carts a unique name to make selecting them from this list more convenient.

2. Click Create Cart
Create a Cart [1:11]
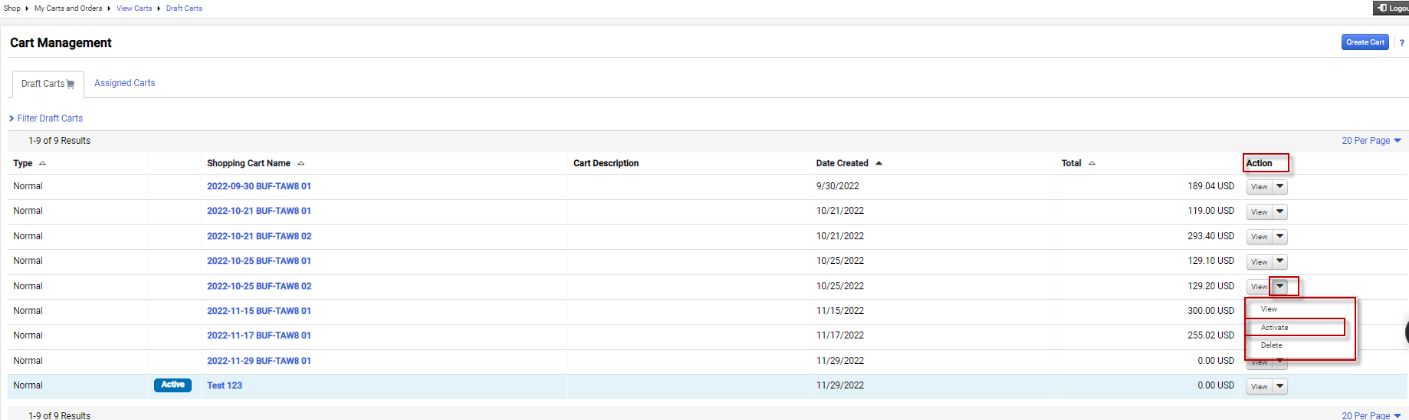
Once you have explored the various ways to navigate to your shopping carts, use the sidebar navigation pane click the Cart icon, My Carts and Orders then select View Carts. After you have clicked View Carts, you will be brought to the Cart Management page. You will notice along the top of the page that there are sub headers, Draft Carts and Assigned Carts (Figure 3).
Note: click on the name of the shopping cart to open.
To start our exercise, click Create Cart.
3. Name Your Cart
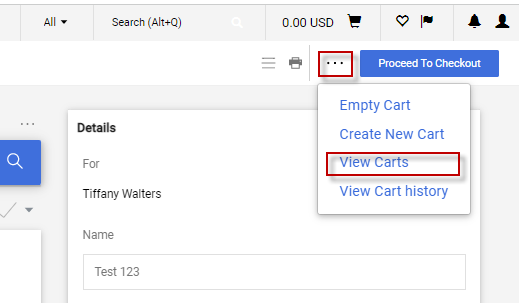
You will be brought to the Shopping Cart screen when you click Create Cart. To make searching for your carts easier, on the right-hand side give your cart a unique name (Figure 4). Select Three Dots in the top right corner to return to the Cart Management page. and click View Carts (Figure 5).

4. Change Your Active Cart
Change Your Active Cart [1:08]
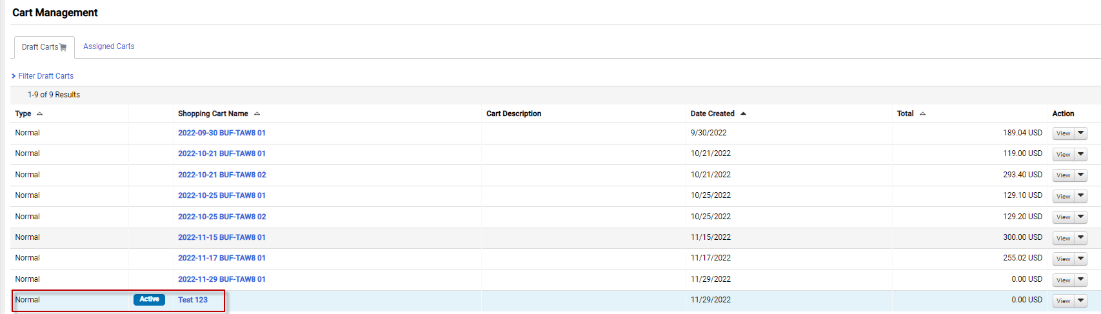
You will notice that when you return to Cart Management, in the Draft Carts tab the new cart you created will now be set as your active cart (Figure 6).
To change your active cart, under the Action column click the arrow next to View of the cart you would like to make active (Figure 7). When a cart is set as active, all the items you add in the future will be put into that cart.
Note: You can also use the dropdown box to Delete and View a cart (Figure 7).
5. Click View My Cart
When you have added your desired items to the shopping cart, click the Shopping Cart icon in the right-hand corner and select View My Cart. When you return to the Shopping Cart page, you will notice that the field of the cart is now populated with the items you would like to order.
6. Edit Items in Cart
From this page, you can perform actions like, change the quantity, move items to another cart, create favorites or remove items.
You can perform actions on an individual line, or you can select all line items. To select an individual line, select the box in the desired line then click the Three Dots (Figure 8). If you wish to select all the lines items, click on the box below the magnifying glass then click the Dropdown Arrow (Figure 9).
Note: after selecting the box, the box will turn into a checkmark.
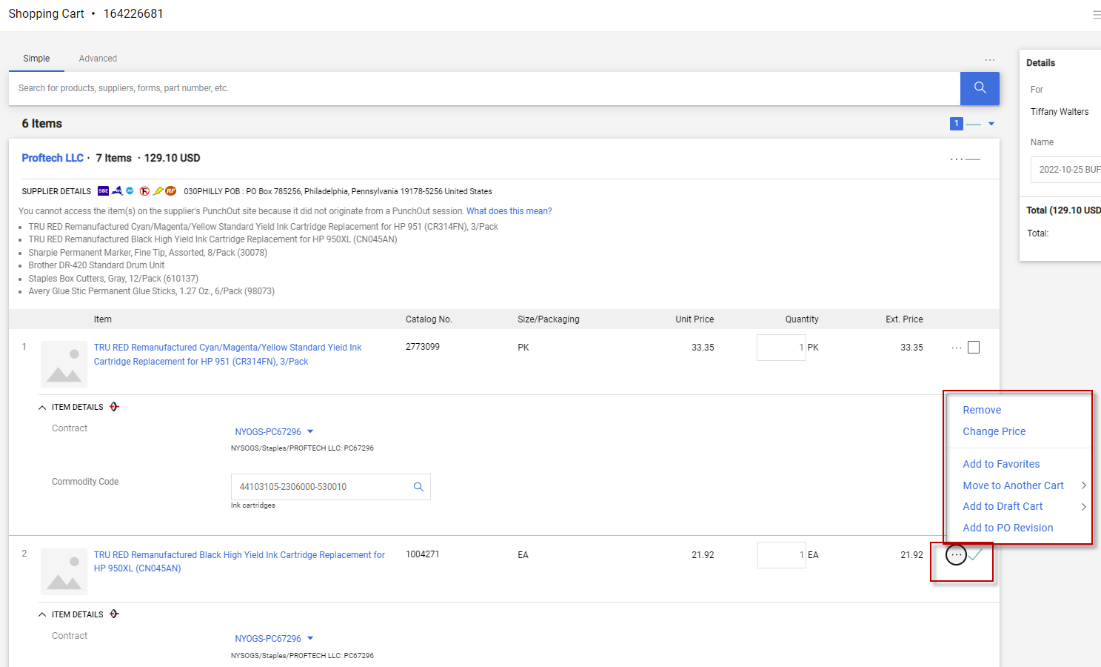

- Move to Another Cart- This action will move your selected lines to another cart and remove them from the cart you are currently in. Items can be moved to either a new cart or an already existing cart (Figure 10).

- Add to Draft Cart- This action will move your selected lines to another cart, without removing it from the cart you are currently in (Figure 11).

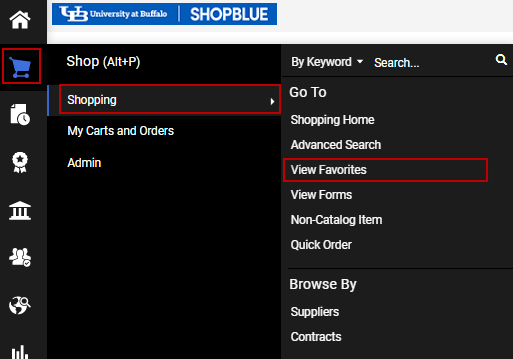
- Add to Favorites- This action allows you to bookmark your commonly used items. To view your favorites, on the left-hand side, you can use the sidebar navigation pane click the “Cart” icon, “Shopping” then select “View Favorites”. (Figure 12).
- Remove- This action removes your selected line(s) from the cart (Figure 13).

7. Proceed to Checkout or Assign Cart
Assign a Cart [1:34]
After you have modified your cart to your liking, you will have to decide whether you would like to Proceed to Checkout or Assign Cart to a colleague (Figure 14).

Figure 14
8. If Assigning Cart, Search for an Assignee
Add Cart Assignees to Profile [1:43]
If you decide to check out, you will be prompted to complete the requisition and place the order. However, if you would like to assign your cart to another person, then you will be prompted to search for an assignee. The quickest way to search for another person, is using their last name or email address (do not include the @buffalo.edu part of the e-mail address). Then click Search.
Note: add a note to send to your assignee, with instructions or comments (Figure 15).
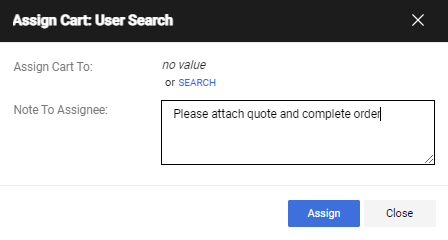
Figure 15
9. Add Cart Assignees
If you would like to create your own custom list of assignees, click on the Person icon in the right-hand corner and select View My Profile, then click Default User Settings and select Cart Assignees. From this page you will be able to add/remove assignees and set one of them as your preferred assignee (Figure 16).

Figure 16
10. View Assigned Carts
View Assigned Carts [0:48]
To see a cart that has been assigned to you or a cart that you have assigned to someone else, return to the Cart Management page and select Assigned Carts To view a cart that has been assigned to you, click View under the Action heading, and then again click View (Figure 17).
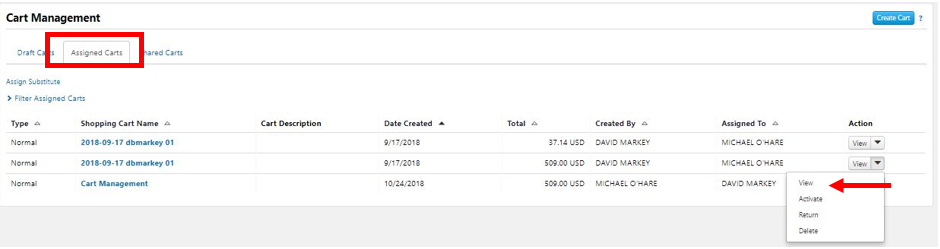
Figure 17
11. Move Assigned Cart
Move an Assigned Cart [1:18]
When you have completed work on your assigned cart, you will have three options moving forward. Your first option is to Proceed to Checkout, your second option is to Return Cart to the requestor and your last option is to Assign Cart to another person (Figure 18).
Note: clicking Return Cart will send it all the way back to the requestor if it has been assigned to multiple people.

Figure 18
12. Unassign a Cart
Unassign a Cart [1:05]
If you have assigned a cart and would like to unassign it and bring it back to your inbox, simply click the View button under Actions and select Unassign (Figure 19).
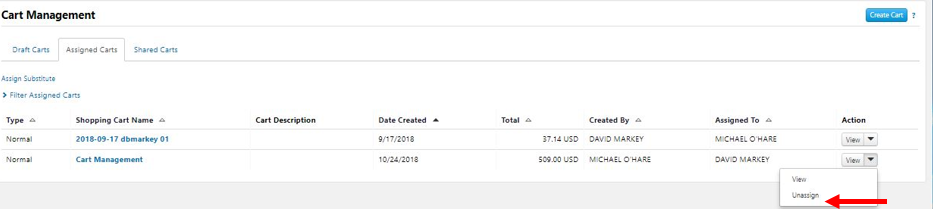
Figure 19
13. Copy to New Cart
If you would like to copy an entire Requisition to a new cart; on the left-hand side, use the sidebar navigation pane click the Document icon, My Orders then click My Requisitions. Select the requisition you would like to view. On the right-hand side select the Three Dots then Copy to New Cart (Figure 20).
Note: only carts containing non-catalog, hosted catalog, or forms may be copied to a new cart.
Replacing Punch-Out Orders
If you need to replace or reorder an existing Punch-Out order, create a new requisition through the Punch-Out catalog and do not copy existing carts. Contracted prices change, and copying an old requisition may result in incorrect pricing on your new requisition, which can result in delays or cancellation of orders.

Figure 20
Need help or have questions?
Visit our Business Services Support Hub to submit and track requests and access helpful resources.