University at Buffalo (UB)
Calendar
See all your events and due dates from all your courses in one place.
On this page:
Overview of Calendar
All items with due dates are automatically added to course calendars.
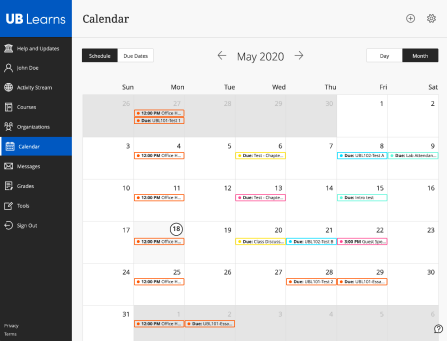

Month view.
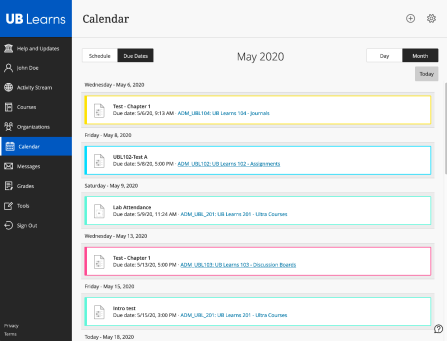

Due Dates view.
- Personal calendars are available for both instructors and students.
- View the calendar by day, month or as a list of due dates.
- Click on an item's title in Day or Due Date view to edit that item's properties.
Viewing Due Dates Only
1. Click the Due Dates button in the top-left corner.
- Clicking the item name takes you to that item within the course.
- For example, cicking on a test will begin the test.
- For example, cicking on a test will begin the test.
- Clicking the course name takes you to the course homepage.
Choosing Which Calendars to Display
- Click the gear icon in the top-right corner of the page. A new drawer slides out from the right.
- Check the calendars you want to see; uncheck those you do not want to see.
- Clicking Clear All will hide all your calendars; it will not change any information you have in your calendars.
- Click on the blue square with the X in it to close the drawer.
Creating a New Event
Students can add events to personal calendars.
- Click the plus icon in the top-right corner of the page. A new drawer slides out from the right.
- By default, the title of the event will be New Event and the current date. If you want to change the title, you can begin typing the new title.
- If you are unable to edit the title, move your cursor over the title, click the pencil icon and begin editing the name.
- Set start and end dates and times. You can also set the event to All Day.
- Click Repeat Event if you want this event to recur. Fill in how often the event repeats.
- Fill in the Location and Description fields, if needed.
- Click Save.
- You may have to refresh the page to see the new event on the Calendars page.
Editing an Event
- Click the Day button in the top-right corner of the page.
- Locate the event and click the title of the event. A new drawer slides out from the right.
- Make your edits.
- Click Save.
Deleting an Event
- Click the Day button in the top-right corner of the page.
- Locate the event and click the title of the event. A new drawer slides out from the right.
- Click the trash can icon.
- Click Delete.
Adding an External Calendar
Importing a calendar will overwrite all the current dates in the calendar.
If you make changes to the external calendar, you will need to export another ics file and re-add it to UB Learns.
You can export calendar data (in the .ics format) from other programs, such as Microsoft Outlook, Google Calendar and Apple iCal, and import those dates to a personal calendar in UB Learns.
- Click the gear icon in the top-right corner of the page. A new drawer slides out from the right.
- Click the ellipsis icon (three dots).
- Choose Add Calendar from the pop-out menu.
- Click the Drop your calendar file to upload.
- Locate a calendar file on your computer.
- Only .ics files are supported.
- Only .ics files are supported.
- Click Add Calendar.
- Click on the blue square with the X in it to close the drawer.
Sharing Your UB Learns Calendars With External Calendars
You can share your UB Learns calendars with other applications such as Microsoft Outlook on Windows, Google Calendar and Apple iCal.
Changes you make to your UB Learns calendars will automatically be updated in the external calendars.
- Click the gear icon in the top-right corner of the page. A new drawer slides out from the right.
- Click the ellipsis icon (three dots).
- Choose Share Calendar from the pop-out menu.
- Click Copy.
- Follow your application's directions for adding an external calendar.
Need additional help?
Use our contact form to submit a help ticket (you may be asked for your UBITName and password). After the form is submitted, a member of the UB Learns support team will follow up with you within one business day.