Building partnerships through collaboration.
Managing Your Groups for Principal Investigators and Cost Approvers
The Lab or Group interface is the central hub for principal investigators and lab or group managers to manage members' access to funding, monitor budget and modify various settings.
Last Updated: February 3, 2025
In this Section
Access Your Lab or Group
In the left-side navigation and under Manage Groups, click My Group and select the lab or group on the next page (Figure 1) or hover over My Group and select the lab or group from the pop-up (Figure 2). If you only have one group, the link takes you to that group.

Figure 1 - Click My Group in the left-side navigation.

Figure 2 - Hover over My Group in the left-side navigation and click the lab or group in the popup.
Navigate Your Lab or Group
Functions for managing your group are organized into various tabs (Figure 3).

Figure 3 - The tabs of the lab or group management page.
Membership Requests and Account Numbers Tab Layout

Figure 4 - The Membership Requests and Account Numbers tab layout.
1. Membership Requests
Users select a principal investigator (PI) during the registration process. When a user selects you as their PI, a membership request will appear (Figure 5).
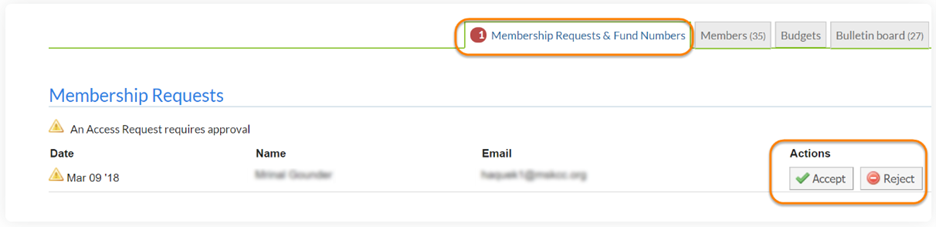
Figure 5 - Click Accept or Decline to add a new member or remove a membership request.
Click Accept or Reject.
Accepting the request adds the user to your lab or group and allows you to assign funding to them.
2. Manage Account Numbers
Assign or unassign access to accounts for your lab or group members. There are various tools to create custom filters for accounts to display and to quickly filter the account numbers visible by account or group member (Figure 6). Expired accounts are shown in red and can no longer be used as a payment method and accounts that expire in 30 days are shown in orange.

Figure 6 - Click the checkbox to assign or unassign an account number to a lab or group member.
3. Disable/Enable Account Numbers
Disable or enable account numbers by clicking the checkbox inline with the account number (Figure 7). This hides the account number from the account number grid.

Figure 7 - Click the checkbox next to account numbers to enable or disable them.
4. History
Displays any changes you made to the lab or group (Figure 8).

Figure 8 -The History section displays any changes that were made.
Customize the Account Number Grid
Accounts can be filtered in the Account Number Grid. Select the account numbers to show and click Save. To clear any customization applied to the account number grid, click Clear All (Figure 9).

Figure 9 - Search for and add account numbers to the filter and click Save, or click Clear All to remove all accounts from the filter.