Building partnerships through collaboration.
Use SIRI Page Options
On any SIRI dashboard, click Page Options to view the available options.
Watch: How to Use SIRI Page Options
How to Use SIRI Page Options
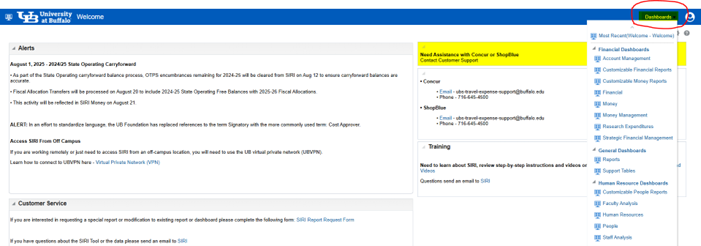
1. Select a SIRI Dashboard
- Log into SIRI.
- At the top, click Dashboards, then click on the dashboard you want to view (Figure 1).
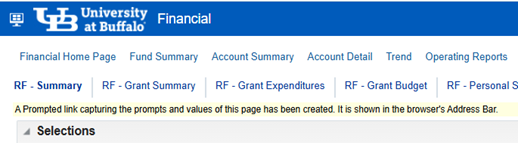
2. Click Page Options
- Click on the gear at the upper right-hand side of the dashboard page and select the option you want to perform for your customized view (Figure 2).
- Click Print for the following menu options:
- Click Printable PDF to create a printable PDF file of the current dashboard.
- Click Printable HTML to create a printable HTML file of the current dashboard.
- Click Export to Excel for the following menu options:
- Click Export Current Page to export the current dashboard to an Excel file.
- Click Export Entire Dashboard to export the entire dashboard to an Excel file. The export process may take a while.
- Click Refresh to refresh the dashboard.

- Create Bookmark Link and Create Prompted Link do somewhat similar things.
- You can Create a Bookmark Link when you want to preserve and share a specific dashboard exactly as you see it.
- You can Create a Prompted Link when you want flexibility to share different filter views.
- Click Create Bookmark Link to create a URL page link of the dashboard that you can copy from the address bar and send to someone. (Note that the recipient must have access to the data to view the report.) Once you click on Create Bookmark Link, a notice will appear in yellow (Figure 3).

You can now copy the URL to send to a recipient. Note that the URL is only available to the recipient for a short period of time and will expire even if the recipient saves the view as a customization.
Click Create Prompted Link to create a URL page link of the dashboard that you can copy from the address bar and send to someone. The link will include any prompts or selections you added to the dashboard. The recipient will need to click Apply to activate the link. (Note that the recipient must have access to the data to view.) Once you click on Create Prompted Link, a notice will appear in yellow (Figure 4).
You can now copy the URL to send to a recipient. Once the recipient opens the URL, they can view and save the customization. A word of caution – the URL and the saved customization expire!
- Enter a Name for the customized dashboard.
- Select Save for Me. Save for Others is not an option.
- If desired, check the box Make this my default for this page if you want the customization to load every time you open the dashboard.
- When finished, click OK (Figure 5).
- Click Edit Saved Customizations to rename or delete your saved dashboard customizations.
- Click Clear My Customization to clear all selections from the dashboard. The dashboard will return to the default so you can start over.
