Building partnerships through collaboration.
Create a Return
In ShopBlue, you can create a return to send back damaged or duplicate items you've received, to accept over received items, or to cancel items in progress.
How to Create a Return
Create a Return [5:33]
Note: Before creating a return, review the instructions to Create a Receiver.
Return Damaged Goods
To create a return, you will be returning to the “Create Quantity Receiver” page like we did in the instructions to “Create a Receiver.”
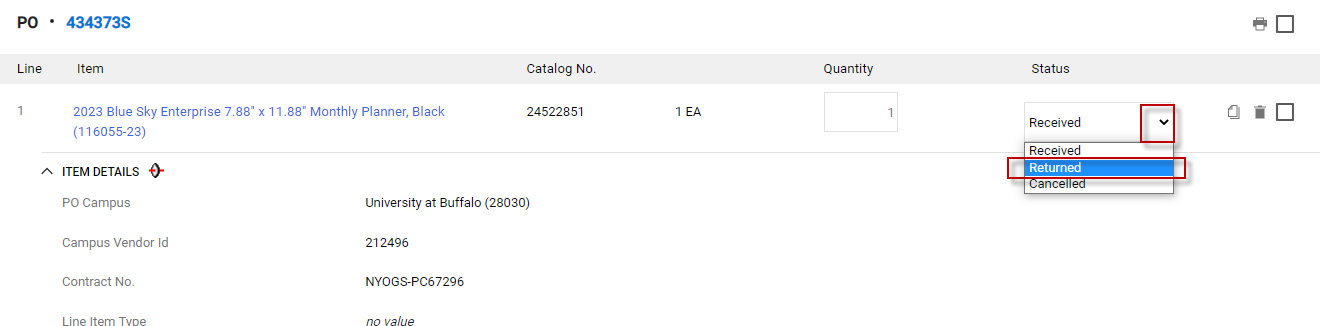
In our first scenario, let us assume that you completed a receiver for an order you received but after opening the package you realize that some of the products are damaged.
To create a return, click the dropdown box in “Line Status” and select “Returned.” To finish, choose the quantity that you will be returning then click “Save Updates” and “Finish” (Figure 1).
Cancel Items In Progress
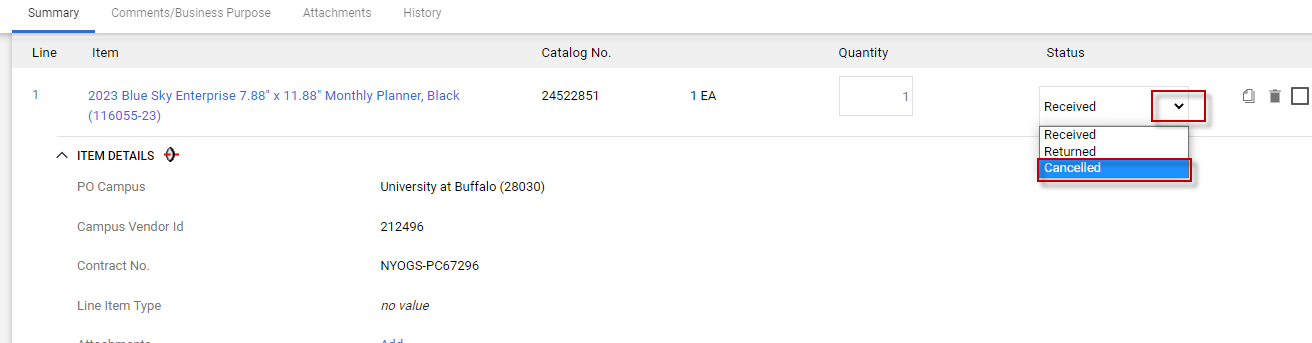
Imagine that a supplier has discontinued an item and you would like to cancel it.
To start, return to the Receiver tab, then click the Plus Sign. Next, under Status click the dropdown box and select Cancelled. To finish, enter the quantity you would like to cancel then click Save Updates and Complete (Figure 2).
Note: using the “cancelled" function does not cancel the order with the supplier, you must still contact the vendor to cancel the order.
Accept Over Received Items
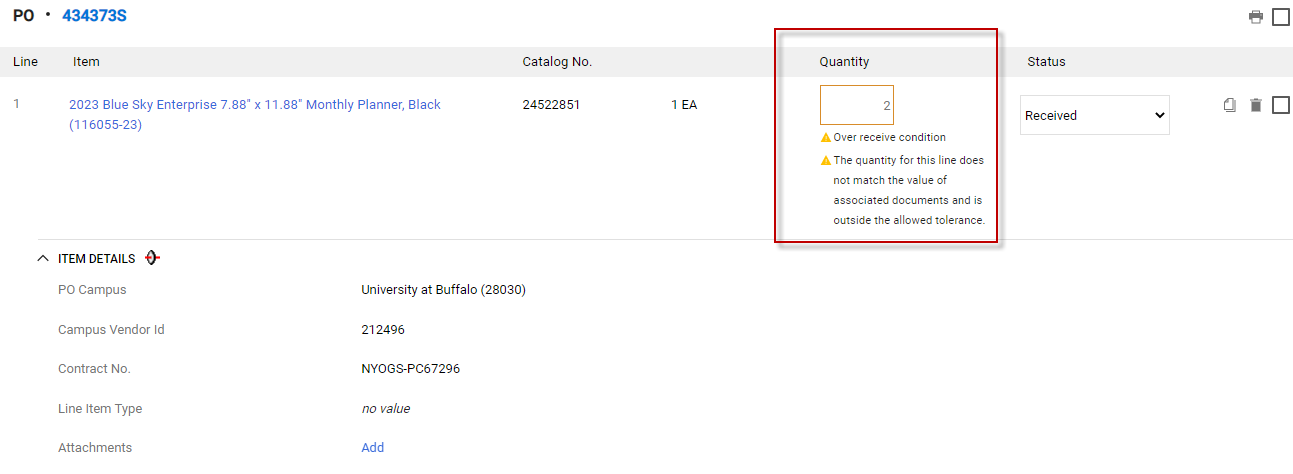
Imagine that you ordered one unit of a product, however when it arrived you actually received 2 units. It is possible in the receiver form to over-receive an item. To do this enter the amount you received into the Quantity field. When you click “Save Updates,” a warning message will pop up saying that you have over-received an item, but you can ignore this message and complete the receiver as is (Figure 4).
See Settlement Status Closed
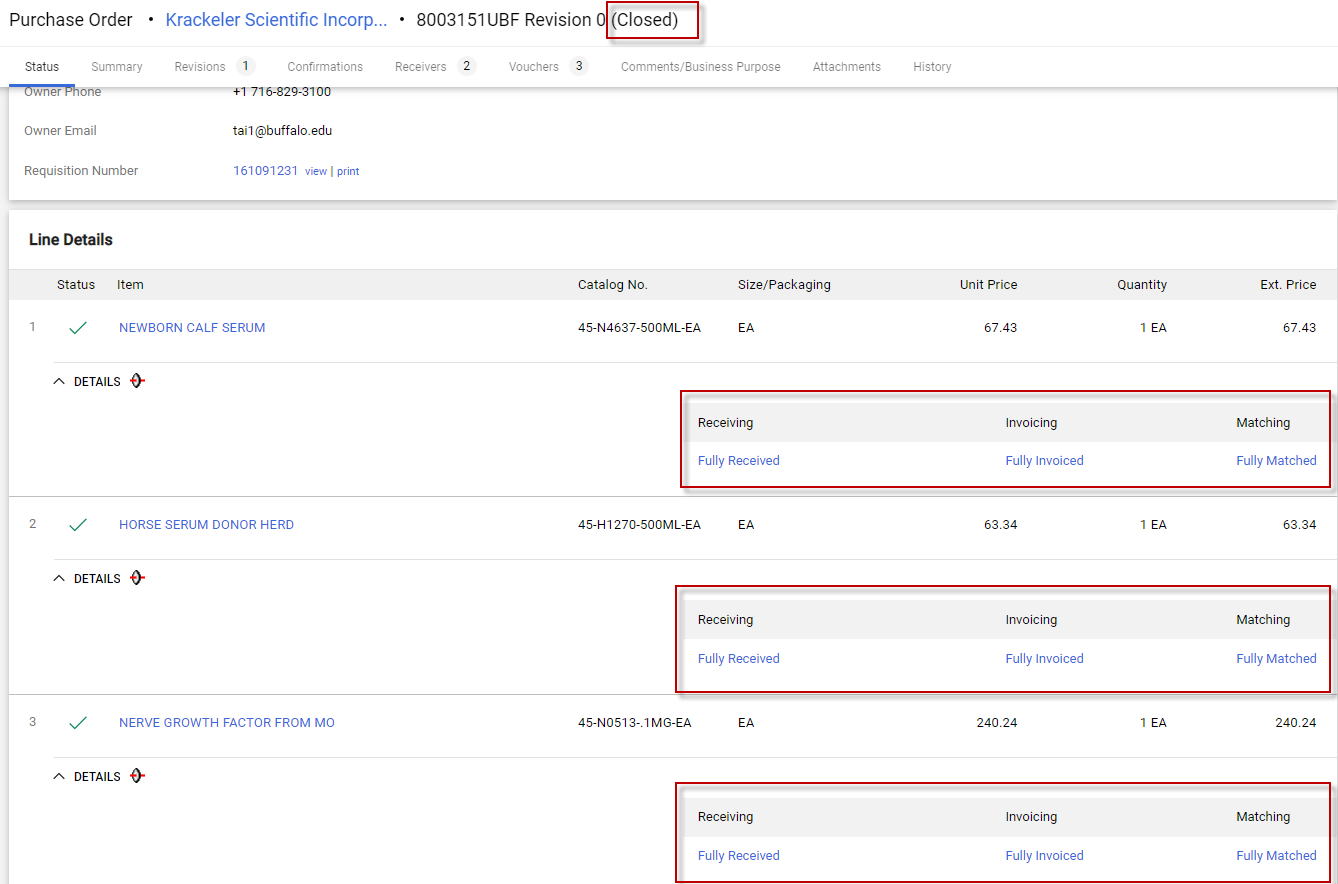
When you have completed your receiver and all of your items have been received, ShopBlue will automatically match up your receiver with the PO and supplier invoice. If all of the documents match up then you will have successfully completed your receiver and the “Settlement Status” will be closed (Figure 4).
Need help or have questions?
Visit our Business Services Support Hub to submit and track requests and access helpful resources.