Building partnerships through collaboration.
Set Default and Favorite Ship-to Addresses From Profile
In ShopBlue, you can save multiple ship-to addresses in your profile for easy access. You can also set a default ship-to address that will automatically populate during checkout.
How to Set Default and Favorite Ship-to Addresses From Your Profile
Set Default and Favorite Ship-To Addresses From Profile [2:10]
1. Access Your Profile
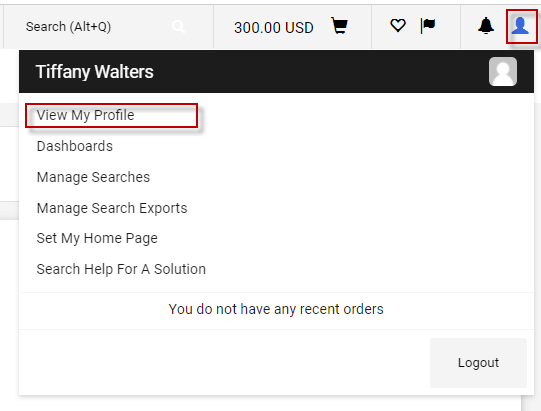
In the top toolbar, select the Person icon from the dropdown menu, select View My Profile. (Figure 1).
2. Select Default Addresses
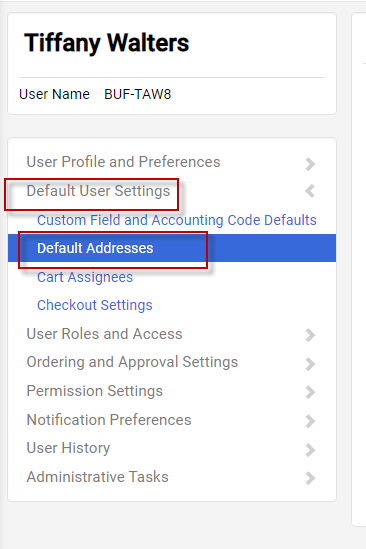
In “Default User Settings,” select “Default Addresses” (Figure 2).
3. Select Addresses for Profile
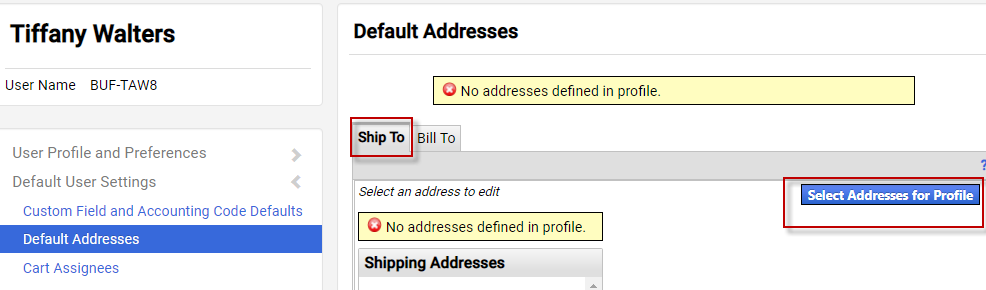
In Default Addresses select the Ship To tab. Note: if this is the first time saving a ship to address, no addresses will appear.
To begin adding ship-to addresses, select Select Addresses for Profile (Figure 3).
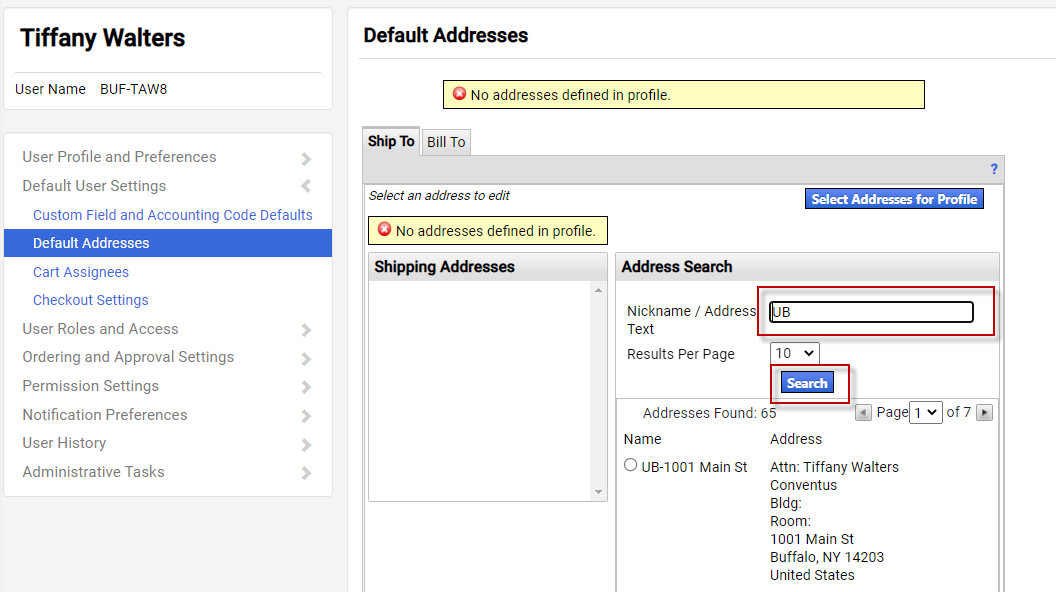
4. Search for an Address
Type UB in the empty field under Address Search to populate address templates for the university (Figure 4).
Note: If you type “north” you will be able to select UB-North Campus. Same for “South” you will be able to select UB-South Campus.
5. Edit Ship-to Address
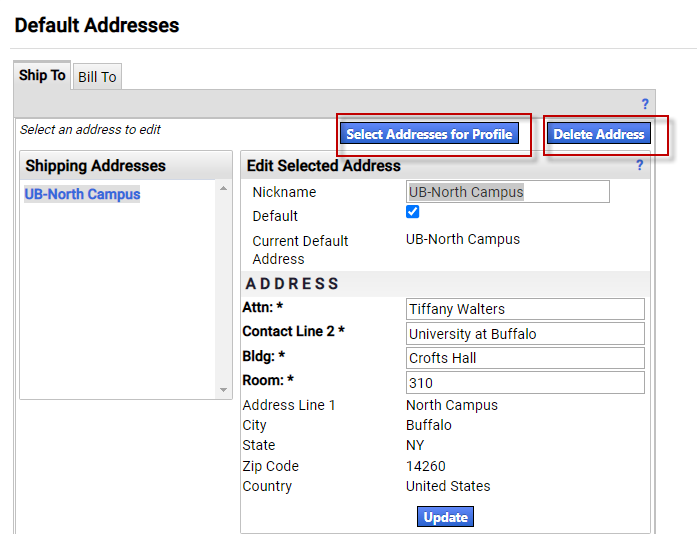
After selecting the desired ship-to address, select the Default box to make that address your default ship-to address. Your default ship-to address will automatically populate when checking out. You can also name the ship-to address by entering a name in the “Nickname” field. Enter in the contact, building and room number. Once completed, select “Update" (Figure 5).
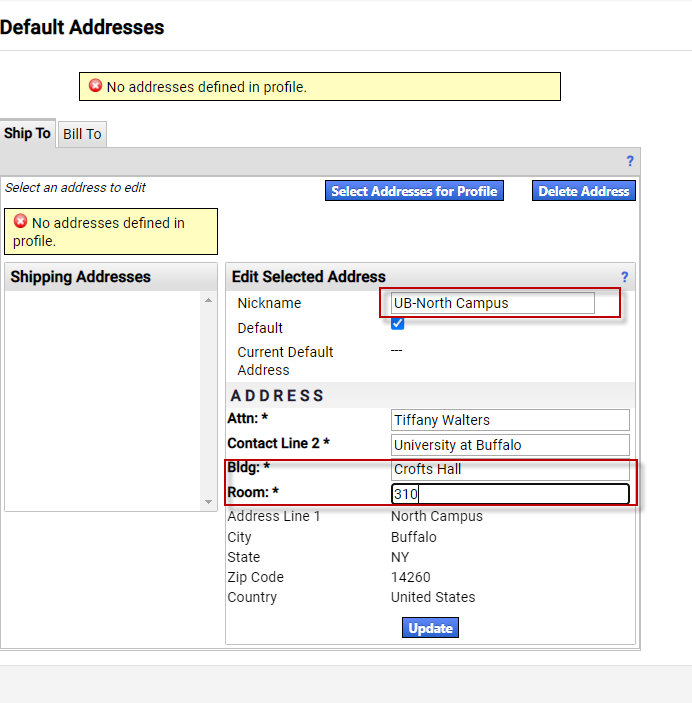
Figure 5
6. Enter Additional Ship-to Addresses
After updating, your selected ship-to address will appear in your shipping addresses. You can save additional ship-to address by selecting “Select Addresses for Profile.”
Note: although users can save more than one address, users can only have one ship-to address selected as their default.
To delete an address, select “Delete Address” (Figure 6).