Setting Up Your Courses in UB Learns
Follow the steps below to set up your courses in UB Learns.
ON THIS PAGE
To ensure all course images and external content (Panopto videos, publisher content, etc.) display properly in UB Learns, users may need to do one of the following:
- Chrome: Set Block third-party cookies in Incognito mode in the Privacy and security section of Settings;
- Firefox: Add ublearns.buffalo.edu to Manage Exceptions in the Privacy & Security section of Settings;
- Safari: Turn off Prevent cross-site tracking in Settings.
- Go to ublearns.buffalo.edu.
- Click Log in to UB Learns.
- Enter your UBITName and password. You will be taken to the UB Learns homepage.
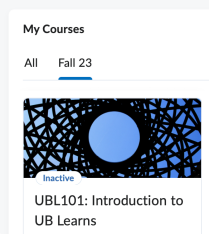
- Click on the appropriate semester tab (i.e. Spring 25) in the My Courses widget to see a list of all of your courses. By default, courses are set to Inactive when created. See step 5 for changing the active status.·
- If Crosslisted is in the course name, your department combined one or more of your courses.
- If you are unsure which courses were combined in Crosslisted courses or you do not see all of your courses, contact your department's course scheduler.
About Course Combinations
- Some instructors, or groups of instructors, combine multiple sections of a course into one site on UB Learns. By doing so, an instructor only needs to maintain and post content in one course, not multiple courses.
- When combining courses, an instructor chooses a parent course; the other courses will be considered child courses. The parent course is the course that will be displayed in UB Learns. Only content in the parent course will remain after the combination is complete; content in the child courses will be deleted. Enrollments for the child courses will be added automatically to the parent course.
Requesting Course Combinations
- Course combinations are processed manually by the UB Learns support team and can take up to one business day to complete.
- To request a course combination, please accurately complete the Request UB Learns Course Combinations form. Inaccurate information may delay your combinations from being completed.
We recommend that users take advantage of the Pin feature to make it easier to find frequently accessed courses. Pinned courses will appear in the Pinned tab in the My Courses widget and at the top of the Course Selector list.
Pinning a Course Using the My Courses Widget
- On the UB Learns landing page, locate the course in the My Courses widget.
- Move your cursor over the course tile.
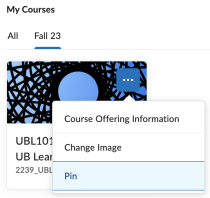
- Click the ellipsis icon and select Pin.
Pinning a Course Using the Course Selector
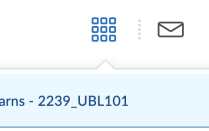
- In the minibar, click the Course Selector (waffle icon).
- Click the pin icon for the course you want to pin.
Instructors must make a course active before students can access the course.
We recommend that instructors set any courses they plan to teach to "Course is active" when they initially enter the course in order to prevent students from being locked out of a course at the Start Date.
An instructor controls when a student can see a course in the My Courses widget and when a student can access a course by using both the Active status and the Start and End Dates. The default Start Date for each course is seven days before the official start date of each course. The default End Date represents the day after the final grading date for the unit.
Students will see a grayed-out course tile and be unable to access the course when a course is Active but the current date is before the Start Date or after the End Date.
Setting a Course to Active and Reviewing Start and End Dates
- On the UB Learns landing page, click the course tile in the My Courses widget.
- On the navbar, click Instructor Only and select Course Admin.
- Click Course Offering Information.
- Find the Active section and click the checkbox to the left of Course is active.
- Review Start Date and End Date. Make any necessary changes.
- The default Start Date is seven days before the course officially starts.
- The default End Date is the first business day after grades are due for the unit.
- Click Save.
It can take up to five minutes for the activation process to complete and the icon on the course tile to update.
All registered students, instructors, course administrators (facilitators) and teaching assistants who have been added to the official course record are enrolled automatically.
The next step is to add people who are not automatically enrolled in the course. This includes additional Teaching Assistants as well as Course Builders and Graders. Only users with the role of Instructor in the course can assign the Instructor role to other users.
Instructors must make a course active before students can access the course.
Double-check to make sure your course is active and the Start Date is set to the date you want your students to have access to the course.
Students log in to UB Learns the same way as instructors and staff (see step 1: Log in to UB Learns).


