


Making an Appointment


Use Navigate to make appointments with academic advisors, tutors and to connect with resources and support campus-wide. Navigate is customized to your UB experience. When you’re ready, use Navigate to make appointments with staff in the following areas.
Academic Advising
- Navigate’s online appointment scheduling is available for all undergraduate academic advising offices.
- Locate your advising center’s contact information. If you are having difficulty scheduling an appointment online, call them directly.
- Graduate students in the following schools may find their assigned advisors for online scheduling:
- Educator Preparation
- Management
- Pharmacy
- Some other graduate departments may use Navigate online scheduling. Check with them directly to confirm their scheduling options!
Non-Academic Areas
- Level Up Gaming
- Student Engagement
- Wellness Coaching
Student Support
- Collegiate Science and Technology Entry Program (CSTEP)
- Experiential Learning Network (ELN)
- Financial Aid
- International Student Services (ISS)
- Math Readiness Assessment (MRA)
- McNair Scholars Program
- Office of Fellowships and Scholarships
- Postdoctoral Scholars
- Student Support Services (SSS)
- Study Abroad
Tutoring and Other Support
- Peer Mentoring
- Tutoring and Academic Support Services
- School-specific tutoring centers
- Writing Assistance
Important!
To provide students with accurate information and needed assistance, designated university staff and faculty have access to Navigate. Students should use caution when sharing sensitive, personal information, particularly via email.
How to Make an Appointment
Navigate offers a variety of ways to schedule appointments with various staff across campus; we outline 3 popular options of scheduling appointments below. Use these instructions to make appointments through the Navigate app or desktop version.
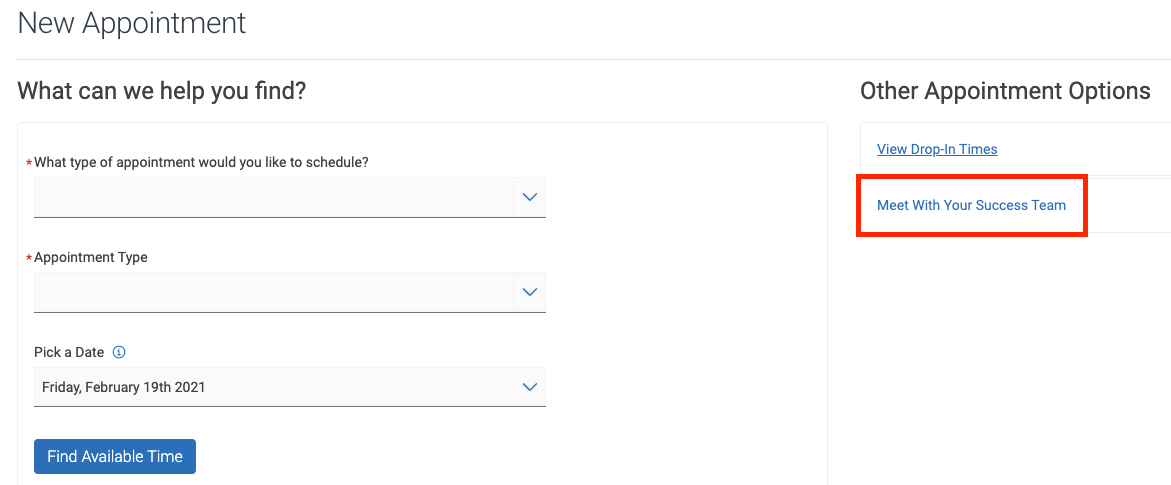
From the home page of EAB Navigate, select the Appointments icon. This will take you to a screen titled "My Appointments," with tabs at the top for your upcoming as well as your past appointments. Scroll to the bottom of the page and select "Schedule an Appointment".
Option 1: Filling in the Drop-Down Menus
1. Choose the type of appointment you wish to schedule (e.g. advising, student support, tutoring, etc.). Then, choose the type of appointment you would like, based on the options displayed in the drop-down menu. Disregard the “Other Appointment Options” as we cover how to schedule appointments that way in the next section of these instructions.
- The options are specific to you. For example, if you are a double major, both majors will display. If your school or college has a tutoring center, you will see that in addition to the university’s central tutoring services.
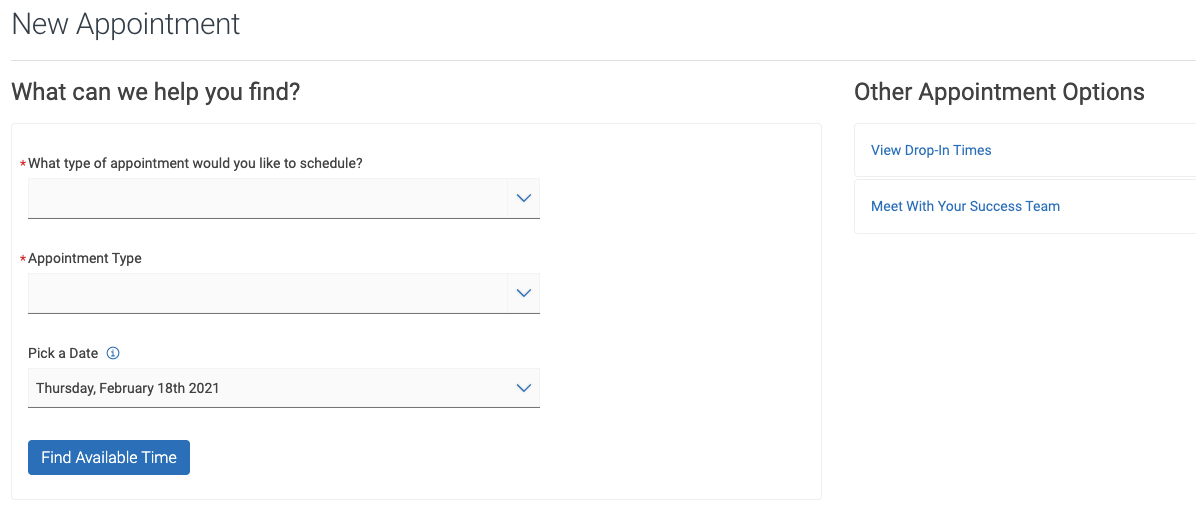
2. After selecting the preferred date you’d like to meet, press the “Find Available Time” button.
- When you select a date, the scheduling feature shows appointments from the start date until 30 days after the start date. Dates with available appointments will have a dot underneath them in the date picker calendar.
- The availability that will display is based on your class schedule and the staff member’s schedule. Appointments may vary in duration based on the type of appointment (ex. Advising, Tutoring, etc.)
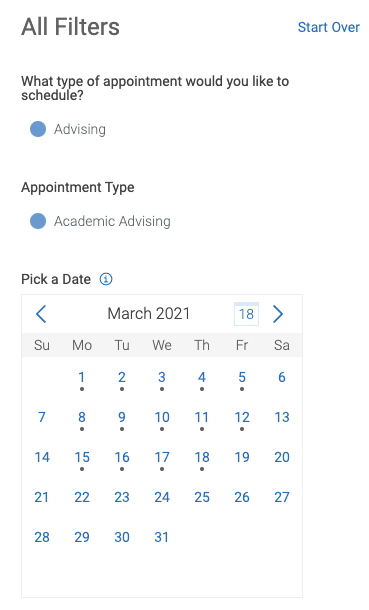
3. You then may use several optional filters, displayed beneath the date picker calendar, such as selecting a location and staff member with whom you would like to meet from the designated drop-down menus.
- If the location you selected allows you to pick a staff member, you can select someone from the list. You can also toggle between the options of staff to see a display of their upcoming availability throughout the next 30 days.
- If you do not have a preference, you can bypass the selection list as it will display all open appointment availability for the reason you selected.
- Some advising centers allow you to only make appointments with your assigned advisor. In this case, you will not need to select a staff member.
- You can search by "how you would like to meet". You can choose from In-person, Phone or Virtual (WebEx or Zoom)
- Options are based on staff member's appointment options and you may not see all types listed.
- The Course selection will only allow selection if your appointment reason is tied to a course or you need tutoring.
4. Select the day and time you would like to meet. The Review Appointment Details page will open.
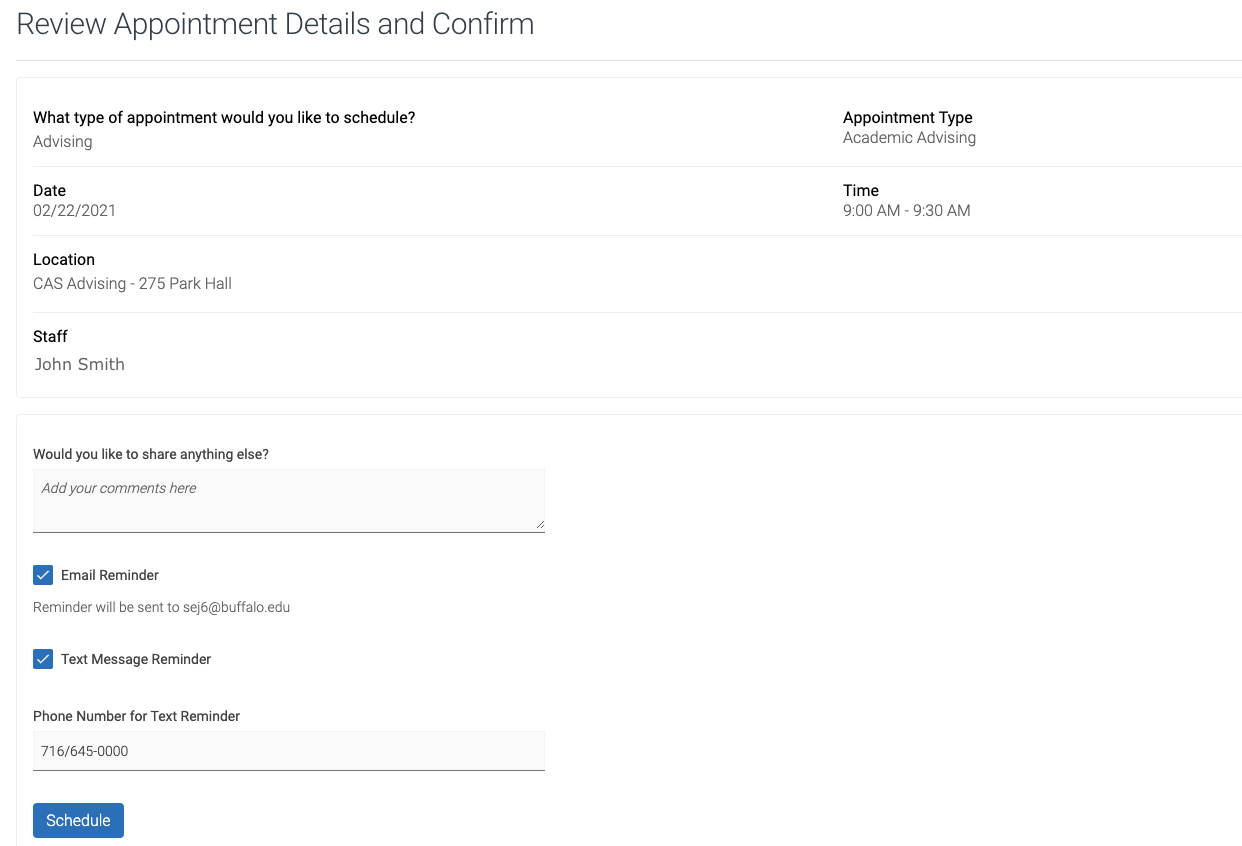
5. Confirm your selection and review the “Details” section carefully.
- If you did not select how you would like to meet on the prior page, you'll be asked to make your selection on the confirmation page.
- Options available here coincide with the staff member's appointment options and you may only see one option depending on the day/time selected.
- If the option available does not work for you, use the Go Back link at the top of the page to return to the appointment options and select how you would like to meet in the filter box on the page.
- In the Comments section, you are required to enter your phone number (with area code) and any information/questions you would like to discuss.
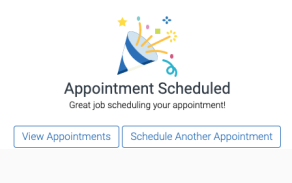
6. Click "Schedule."
- You as well as your advisor, tutor, or staff member will each receive an appointment notification email at your @buffalo.edu email addresses immediately as well as an appointment reminder 4-6 hours prior to your actual appointment.

7. You can cancel appointments if needed.
- Please be mindful that departments have the ability to determine how far in advance you can cancel appointments. Check with them about their process and review canceling an appointment.
Option 2: Scheduling Directly with Your Success Team
1. Instead of filling in the drop-down menus as previously explained, you can instead select “Meet With Your Success Team” from the Other Appointment Options area.
2. A list of your assigned success team members appears. These can include assigned academic advisors, supplemental advising services, such as Prehealth advising, assigned peer mentors, etc.
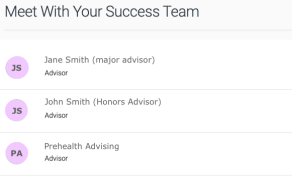

3. Clicking the name of a success team member opens the New Appointment page.
- If the staff member has more than one service available, you need to select an appointment type from the drop-down menu before seeing the page with time slots.
NOTE
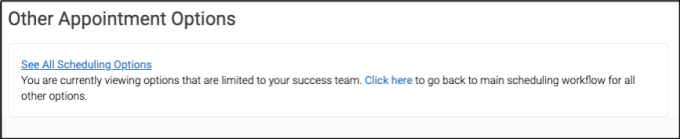
Upon selecting the Success Team member with whom you would like to meet, you may encounter the following message: "Sorry! There are no availabilities supporting the scheduling of Appointments at this time."
If you do, please select "click here" under the Other Appointment Options to take you back to the main scheduling workflow and follow our instructions for option one above.
4. After choosing a service, you are taken to the page with time slot options.
- In some cases, you may need to see more options, or the staff member is not available. In the “Other Appointment Options” area, you can click “See All Scheduling Options” to broaden the options available.

5. Follow the instructions from above (step number 2 and beyond) to successfully schedule an appointment with one of your success team members.
Option 3: Making a Campaign Appointment
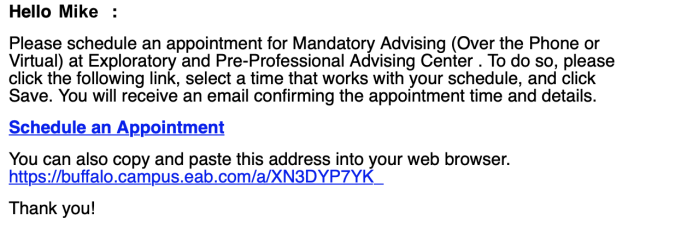
You may be invited to schedule an appointment for a specific reason from a staff member via email, which is known as an appointment campaign.
1. From the email you received, click the “Schedule an Appointment” link, or copy and paste the address into your web browser.

2. Or, from the home page of EAB Navigate, select the button “Schedule This Appointment” from the yellow banner.


3. The scheduling page will appear, with the options from the appointment invitation pre-selected.
4. Selecting a time slot brings you to the Review Details page just as it does when scheduling an appointment as outlined above.
5. Confirm your selection and review the “Details” section carefully. In the Comments section, you are required to enter your phone number (with area code) and any information/questions you would like to discuss.
6. Click Schedule.
- You as well as your advisor, tutor, or staff member will each receive an appointment notification email at your @buffalo.edu email addresses immediately as well as an appointment reminder 4-6 hours prior to your actual appointment.