University at Buffalo (UB)
Empowering Instructors | Supporting Excellence

Published April 10, 2024
As we enter the 2nd half of the semester, the focus for many of us turns to final grades. If you have been entering your grades in HUB for a while, you are likely familiar with the classic options of either manually entering every grade for your students - a tedious process especially if you have a larger class, or uploading a spreadsheet with all the final grades for your students. Enter the freshly created upgrade by the UB Enterprise Application Services department. The new option allows instructors to download their grades without needing to reformat the columns except for having a column (either Final Calculated Grade or Final Adjusted Grade) with the official grades indicated.
In most cases this means a letter grade, however, some courses use Satisfactory/Unsatisfactory or Pass/Fall as their official grades. Step-by-step instructions follow below.
One of the great features in our new version of UB Learns is that we can now separate our grades by sections. If you have combined your classes, this feature allows instructors to see what is happening in their classes by user, section, or even group. For grades, this will make grade entry into HUB that much easier.
To get started, there are a few things to understand and prepare. The default grade scheme in UB Learns is percentage. This will need to be changed to reflect the office grade scheme for your course, meaning: letter grade, S/U, or P/F.
If your course is using a non-standard grade format, (i.e. your letter grade format uses values that are different from the UB Letter Grade template) be sure to create that grade scheme in UB Learns.
Are you using calculated or adjusted final grades for your class? This is important as it is this column that will indicate the final grades for the course. In most cases, the calculated grade is the column that will be released, and this is also the default.
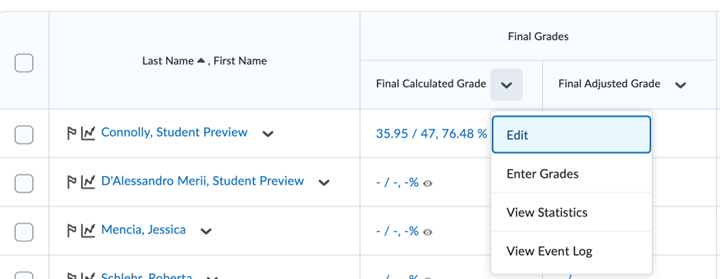
Next, you should adjust the view of the Final Grade column. To do this, navigate to the grades page, select manage grades, then select the column to adjust and select edit. In the example below, the Final Calculated Grade is what needs to be adjusted. I have selected the column to edit from the page called Enter Grades, using the Standard (instead of Spreadsheet) view.
Next, I will adjust what I can see as an instructor. This is done by editing the default settings of the Managing View.
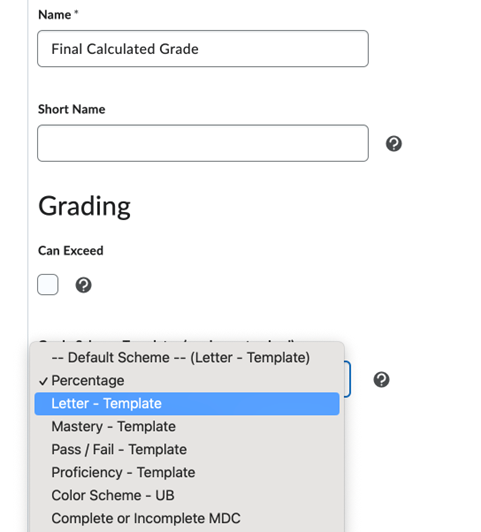
The first step is to change the grade scheme from percentage to letter grade as this is the official grade needed for my course. I can use the UB Letter Grade Default template for that. Note: if your letter grades differ from the UB Letter Grade default, you can modify this in the grade schemes [add link to grade scheme guidance here].
1. From the Final Calculated Grade dropdown, select Edit.
2. Scroll to Grade Scheme Templates
3. From the dropdown menu, select the grade scheme you wish to use. In this case, I am selecting the Letter – Template.
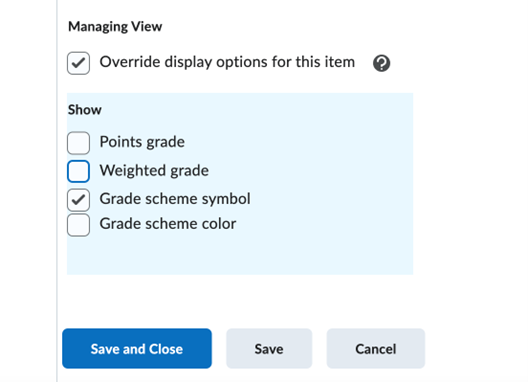
Managing View options.
4. Next, scroll down to Managing View to make sure you are showing the Grade scheme symbol (letter grade). You can also choose to remove any of the other options that may have already been selected. You can change the default settings by selecting “Override”. In the example, I selected to see only the grade scheme symbol (Letter Grade).
5. Click Save and Close once you have made your selections in order for the changes to take effect.
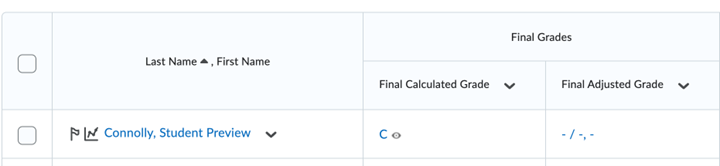
6. This will bring you back to the Enter Grades page where you will see the Grades.
Grades displayed on the Enter Grades page.
If you are satisfied, no additional changes need to be made, however, if you want to make any additional changes, follow the previous instructions.
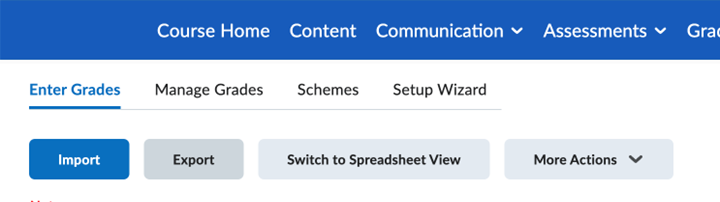
Now I am ready to export my grades in preparation for grade entry to HUB. At the top of the Enter Grades page, select Export Grades.
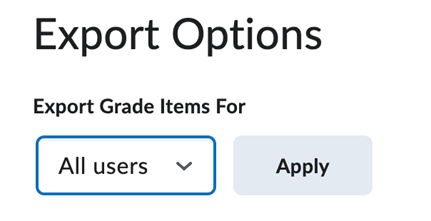
Select the details you would like to see. Note: the default view is “users”. If you combined your courses, you can choose to separate the view by sections by selecting the dropdown for Export Options at the top of the page.
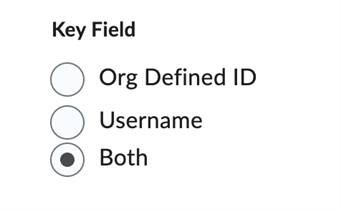
Next, select the Key Field. Choose either “OrgID” or “both” as the OrgID is the Student ID number that is required in the upload.
As you scroll down to the options to include, you can select the entire spreadsheet, but at minimum, select the Final Calculated Grade column (or whichever column has your final grades). In the example, we adjusted the Final Calculated Grade column in the previous section, and now the letter grade is displayed in the column.
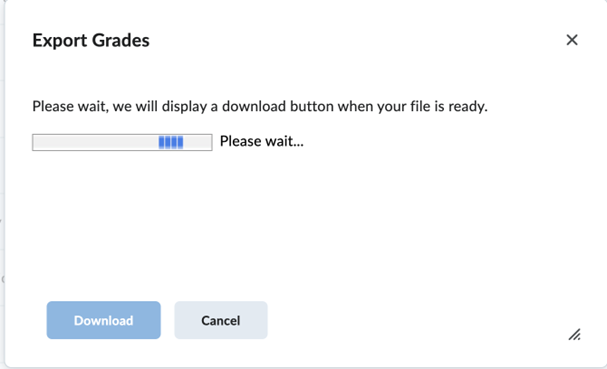
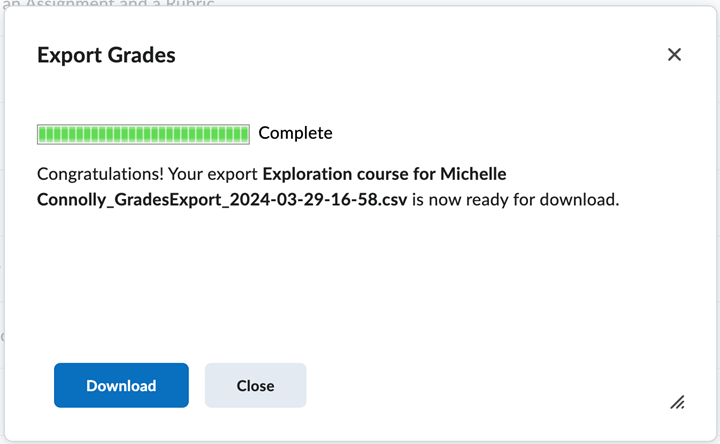
Select Export to CSV.
A dialog box will open to let you know that the file is being processed. Once it is complete, you will be able to download the file.
The file name will likely exceed 60 characters and will need to be renamed. Save the file in your preferred location and shorten the name to less than 60 characters using a name that you will easily recall (ex. Spring 2024_UBC399_Final Grades).
You have now prepared your grades to upload to HUB. Next, follow the guidance to import your grades into Faculty HUB. This entire process should take you just a few minutes to do rather than hours to enter grades one by one.
Office of Curriculum, Assessment and Teaching Transformation
716-645-7700
ubcatt@buffalo.edu