Using the Teaching Station Projector, Lights, Microphone, and Camera in a Technology Classroom
Operating System: All
Applies To: UB instructors
Last Updated: December 17, 2025
On this page:
Using the Projector
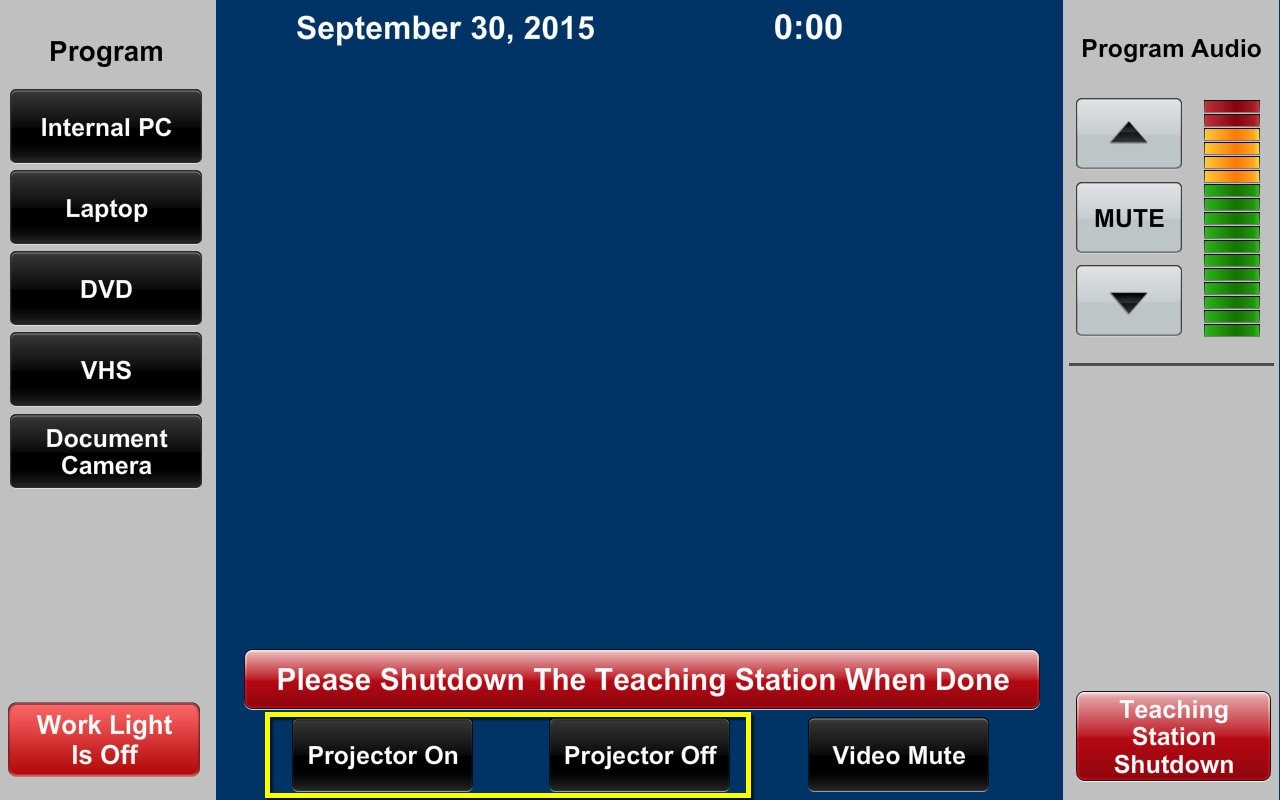
The Projector controls are on the bottom of the Crestron touch panel.
- Press Projector On. A countdown and a Projector Warming Up message will appear in most rooms
- Press Projector Video Mute to prevent the image on your device from being displayed on the large classroom screen. A button will flash to remind you
- Bring the screen down:
- In most large classrooms, turning the projector on will lower the screen automatically
- In some large classrooms the screen can be lowered using controls on the touch panel
- In smaller classrooms, pull the classroom screen down manually or, in some rooms, use the switch on the wall
- Press Projector Off when you are finished. A countdown and Projector Cooling Down message will appear in most rooms
Classroom Lighting
Smaller Classrooms
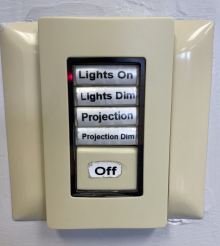
Classroom lighting is controlled by either the Crestron touch panel or a wall switch located near the Teaching Station or door.
1. Dim lights using the Crestron touch panel or wall switch
2. Turn all lighting on when finished

Larger Classrooms
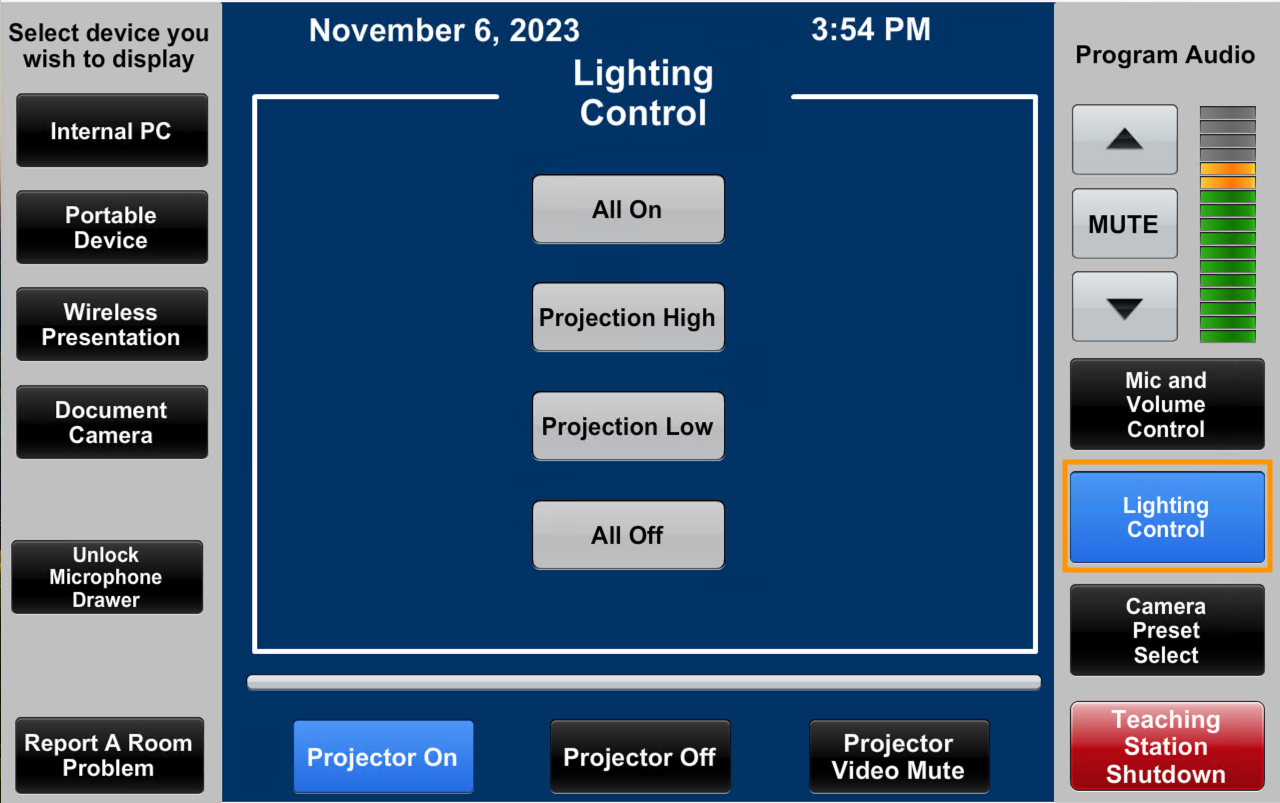
Larger classrooms have controls on the right-hand side of the Crestron touch panel and may work automatically with the projector settings.
1. Press Projection High or Projection Low for lighting when using the projector.
2. Press All On or All Off to control the classroom lights.
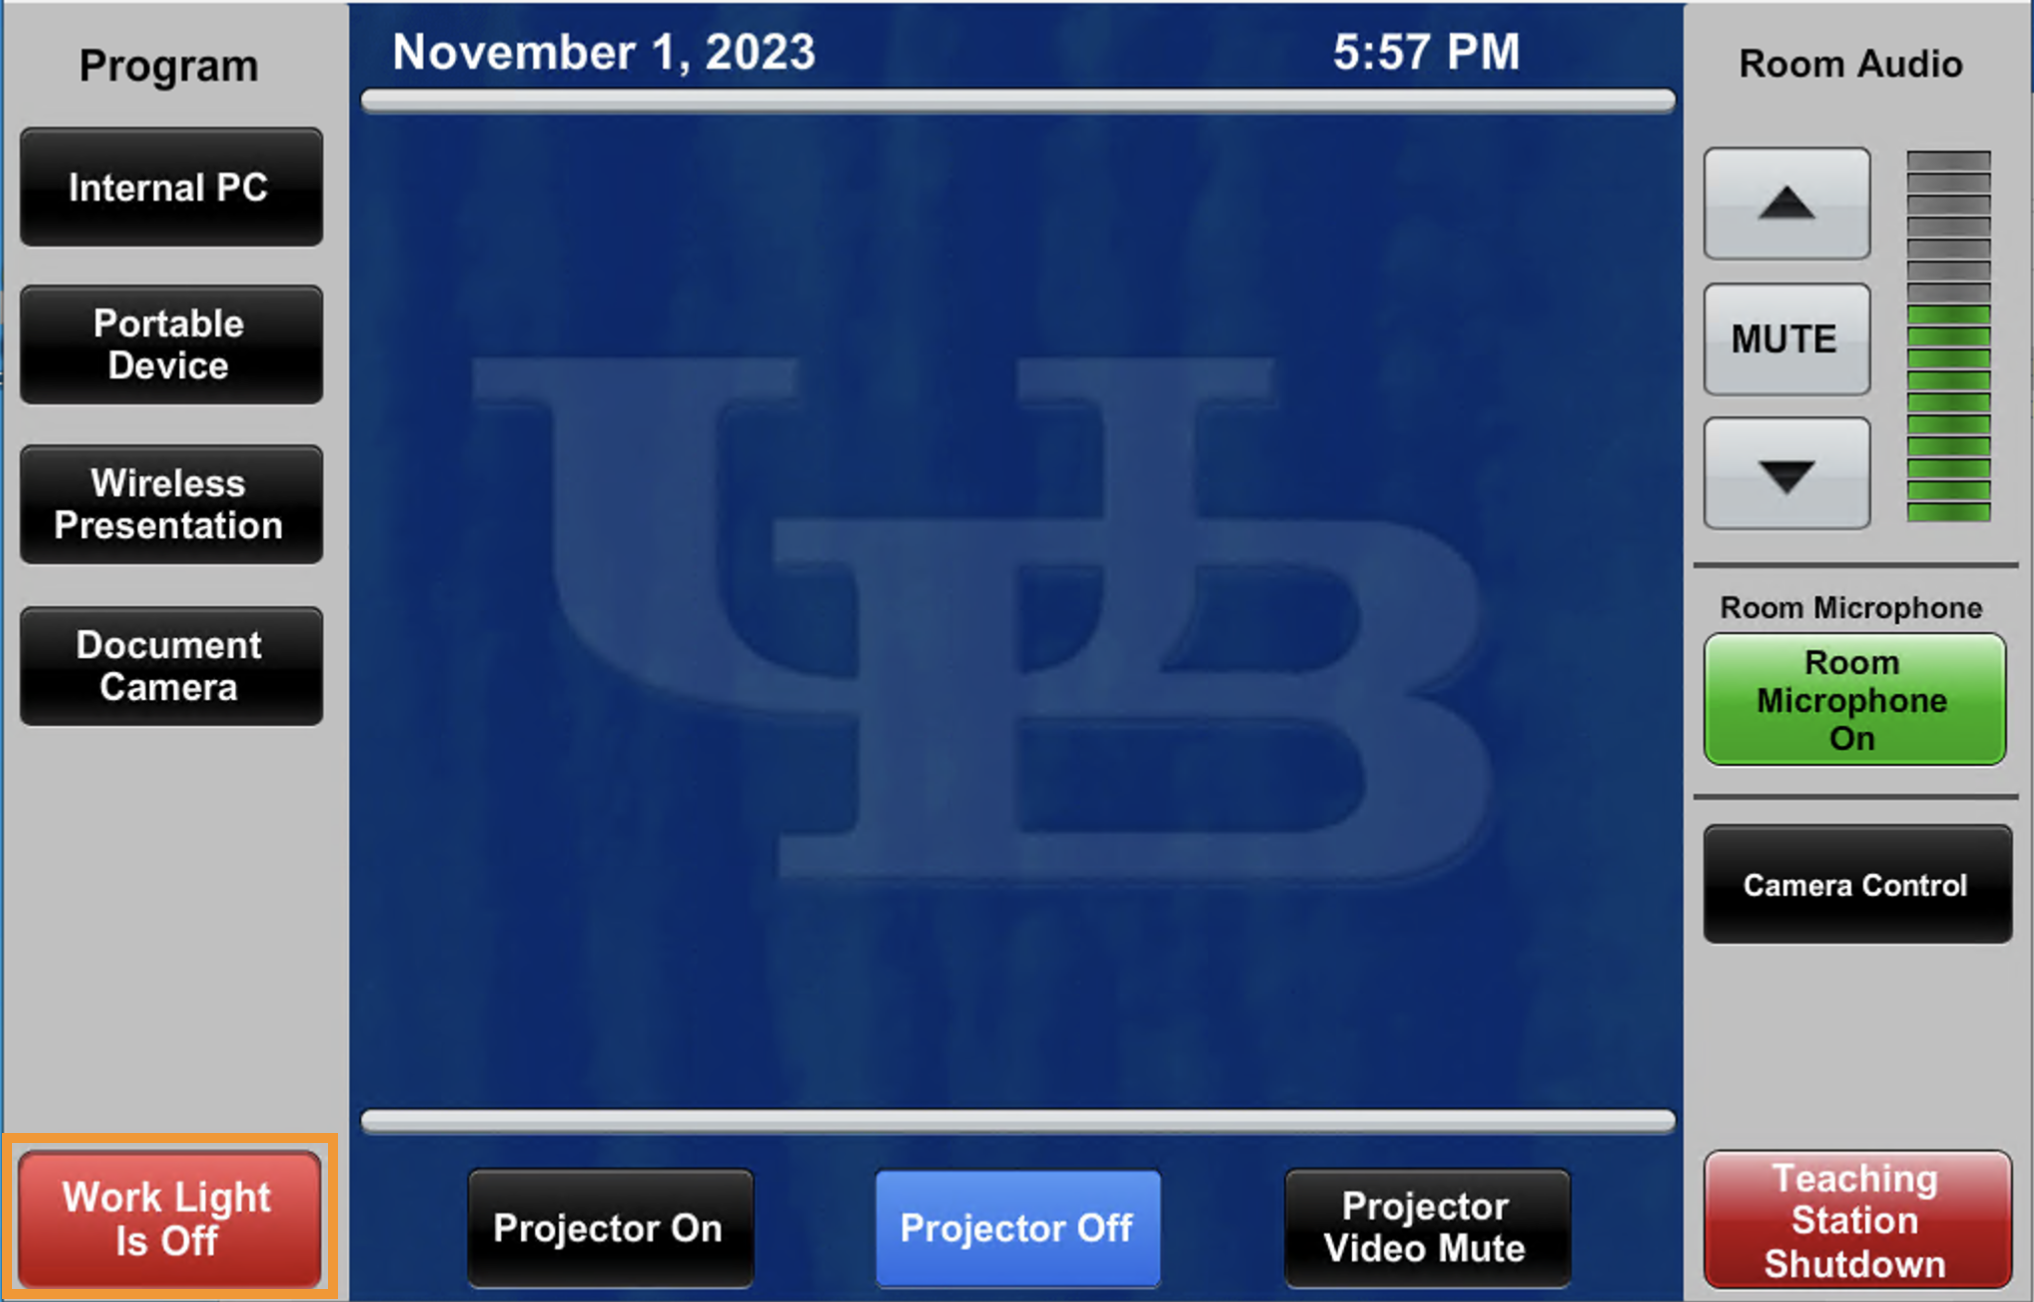
Work Light
In rooms with a Work Light button, the button controls the document camera light.
It can be used to illuminate the teaching station desktop.
Audio Controls
Save Your Ears: Devices may also have their own volume control. Turn volume all the way down and bring it up gradually to the desired level. Some players, YouTube for instance, may also have their own volume control.
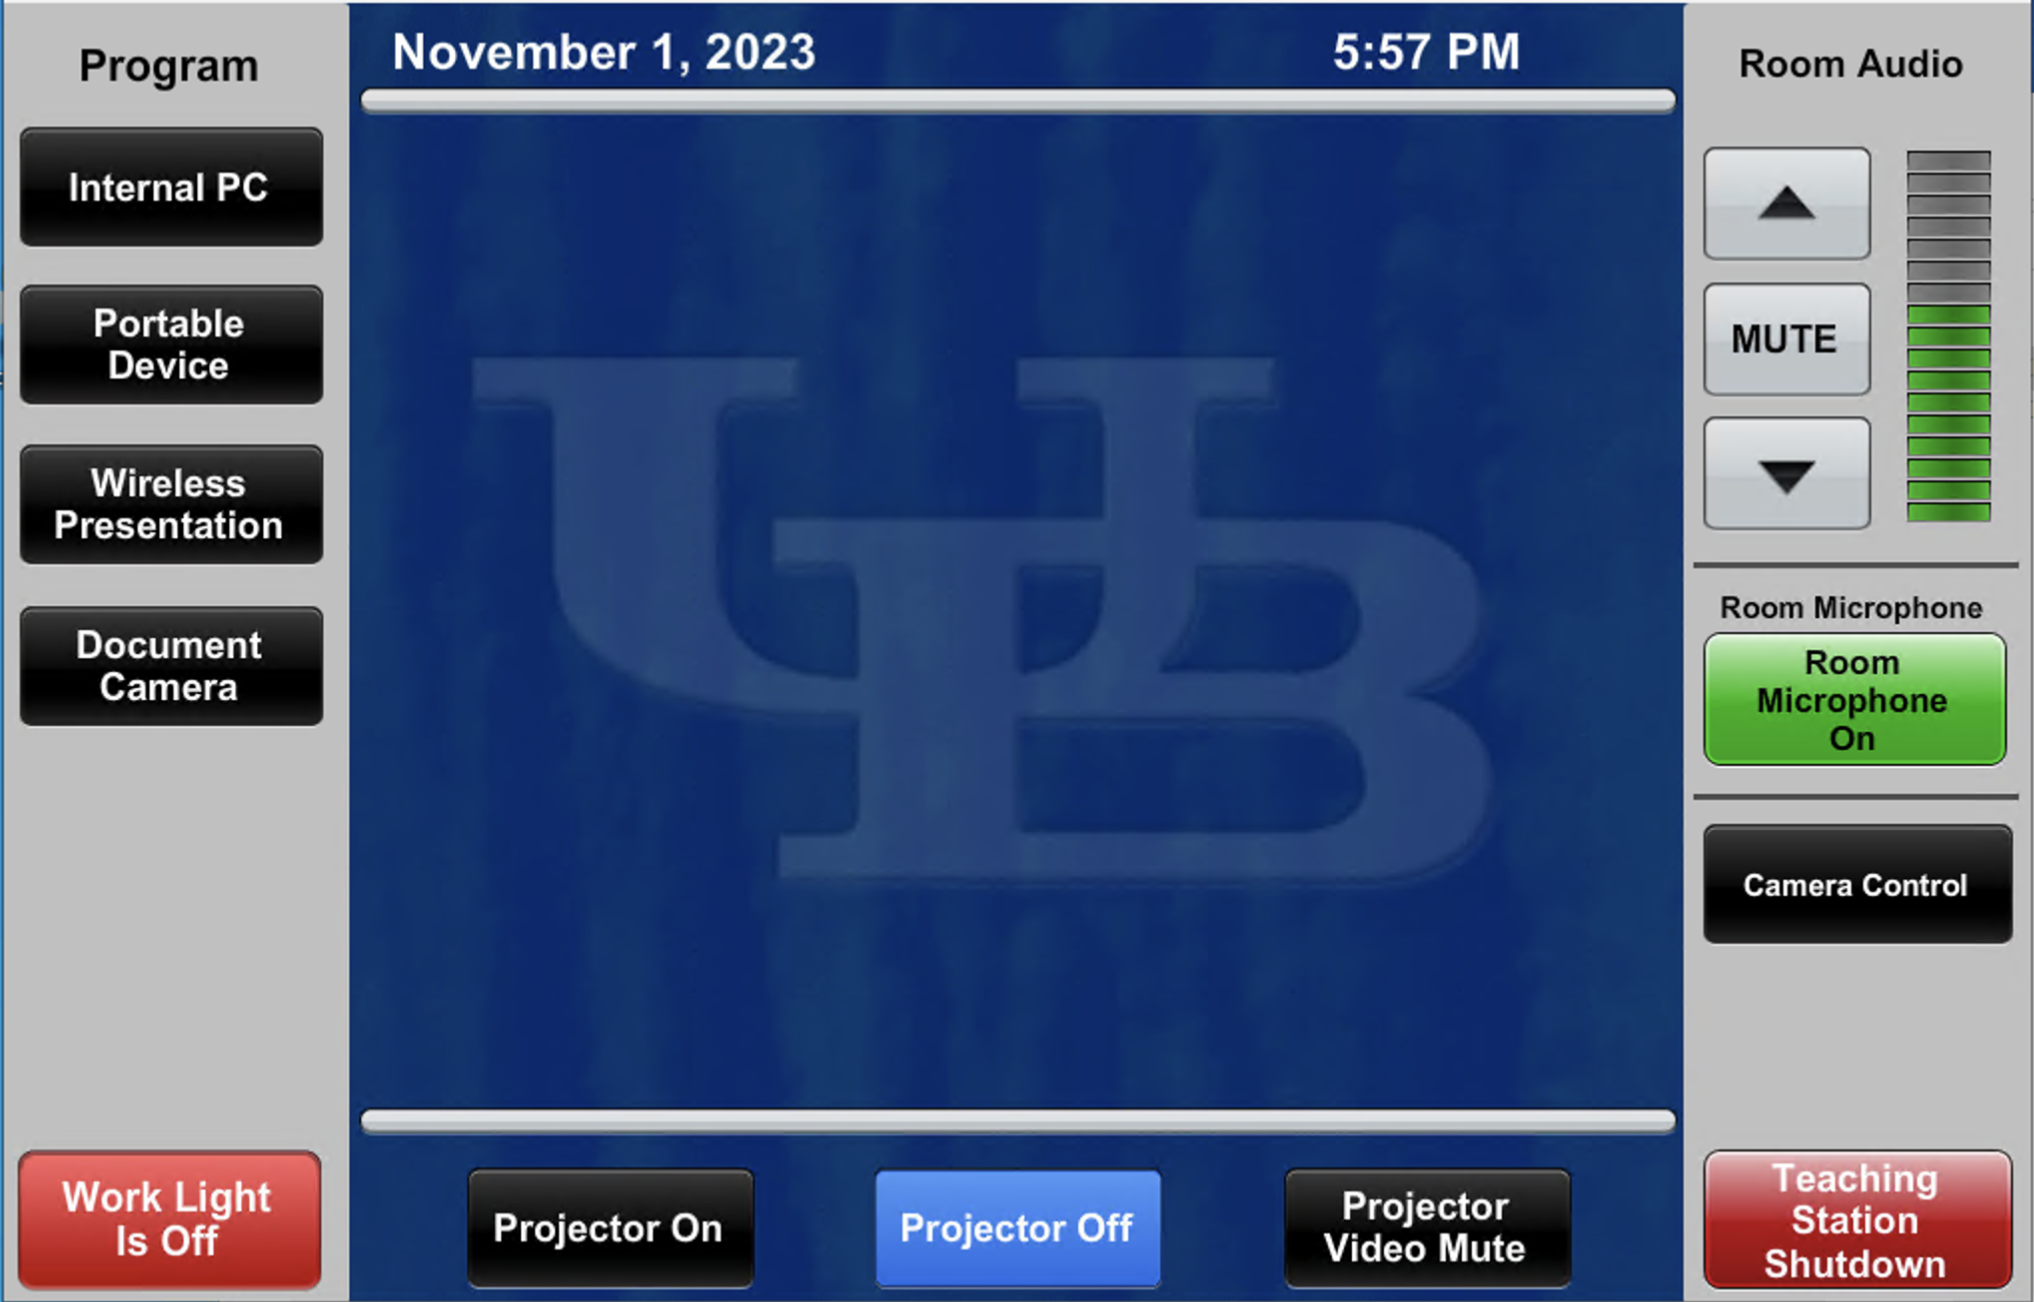
The Program Audio or Room Audio controls raise and lower the volume of computers and other devices connected to the display.
1. Press Up Arrow or Down Arrow to raise or lower the volume.
2. Press Mute to silence the sound.
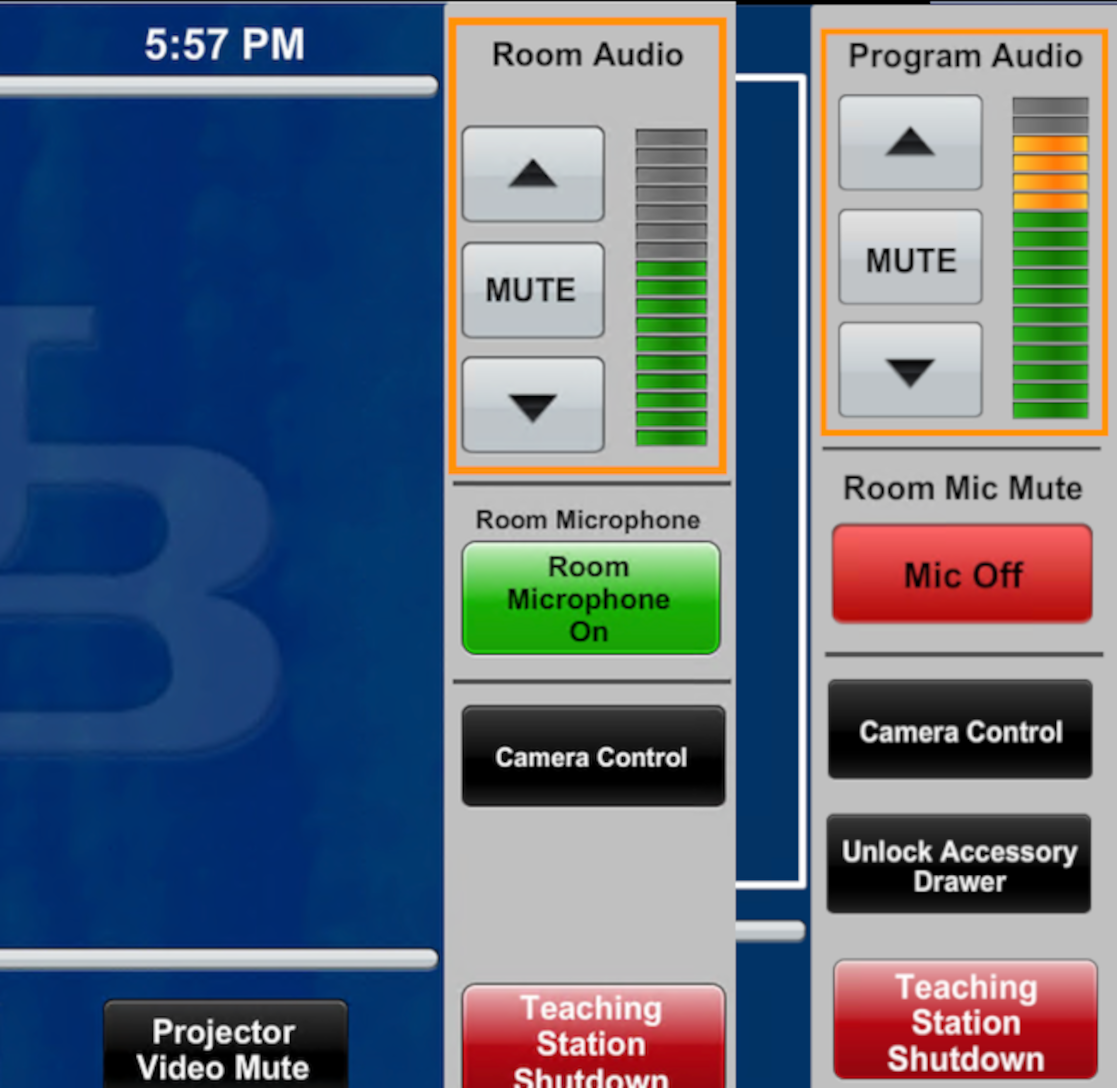
Program Audio or Room Audio volume does not affect microphone volume.
If a room has wireless microphones look for the Microphone Control button to adjust the level of individual microphones.
Microphones
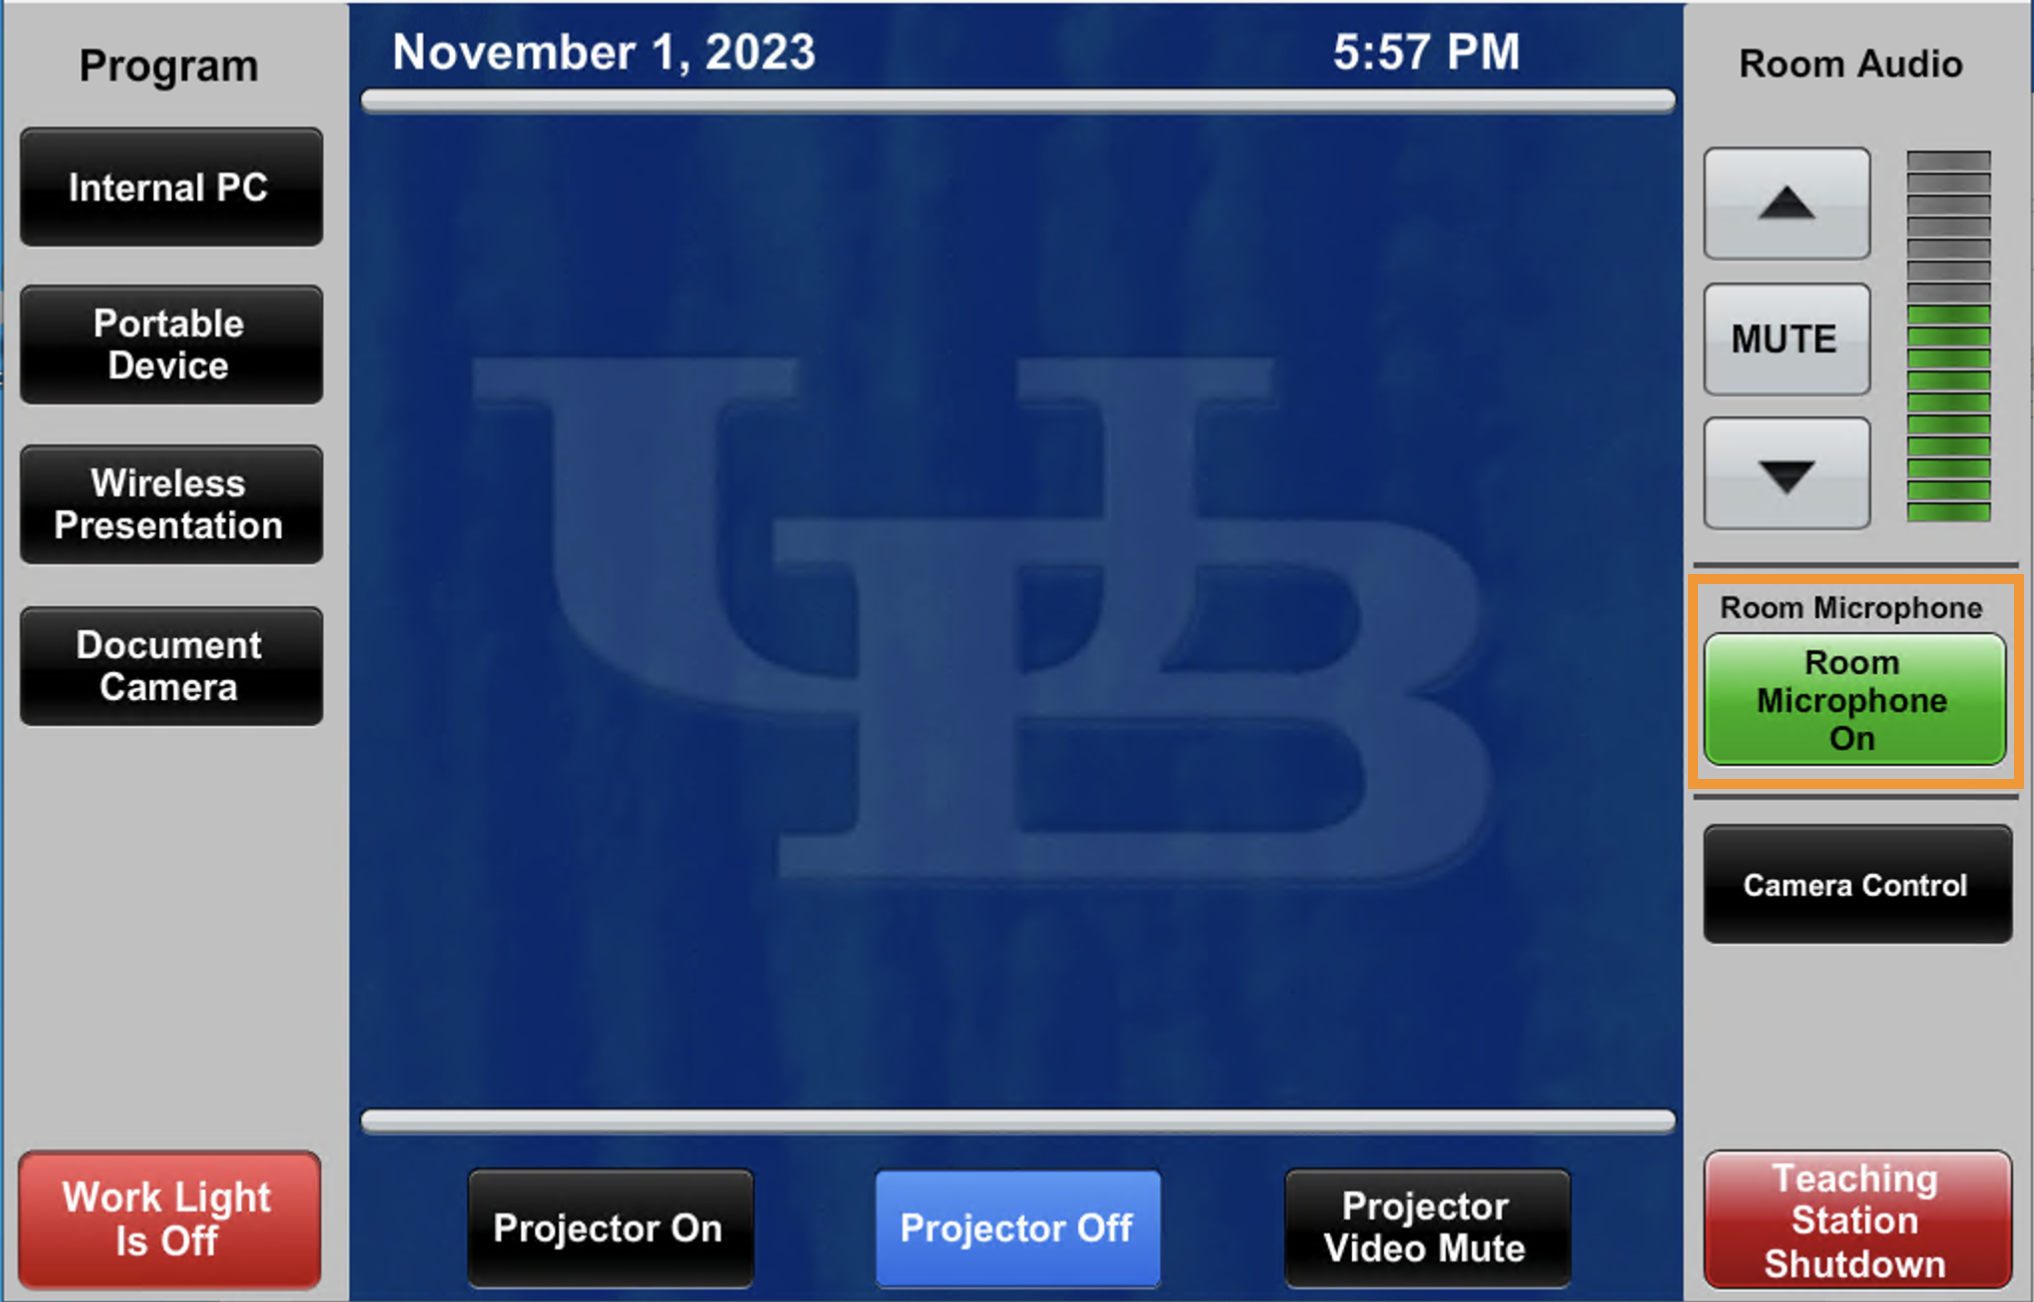
Check your classroom for available microphones. Most smaller classrooms have a microphone in the ceiling tiles. Use the Room Microphone or Room Mic Mute button on the touch panel to turn the mic on or off.
Larger classrooms have wireless microphones stored in a locked drawer; usually one lapel mic and one handheld mic. To access the mics:
- Press Unlock Mic Drawer or Unlock Accessory Drawer to open the drawer and access the wireless microphones
- Press Microphone Control to adjust the level of individual microphones
- If there is more than one microphone in the classroom, Mic 1 is the lapel mic.
- The Program Audio/Room Audio control does not affect microphone volume.
Some lecture halls also have a small mic mounted to the teaching station (a button mic). When unmuted, this mic can be heard on recordings and in Zoom. It picks up sound in about a 10 foot radius.
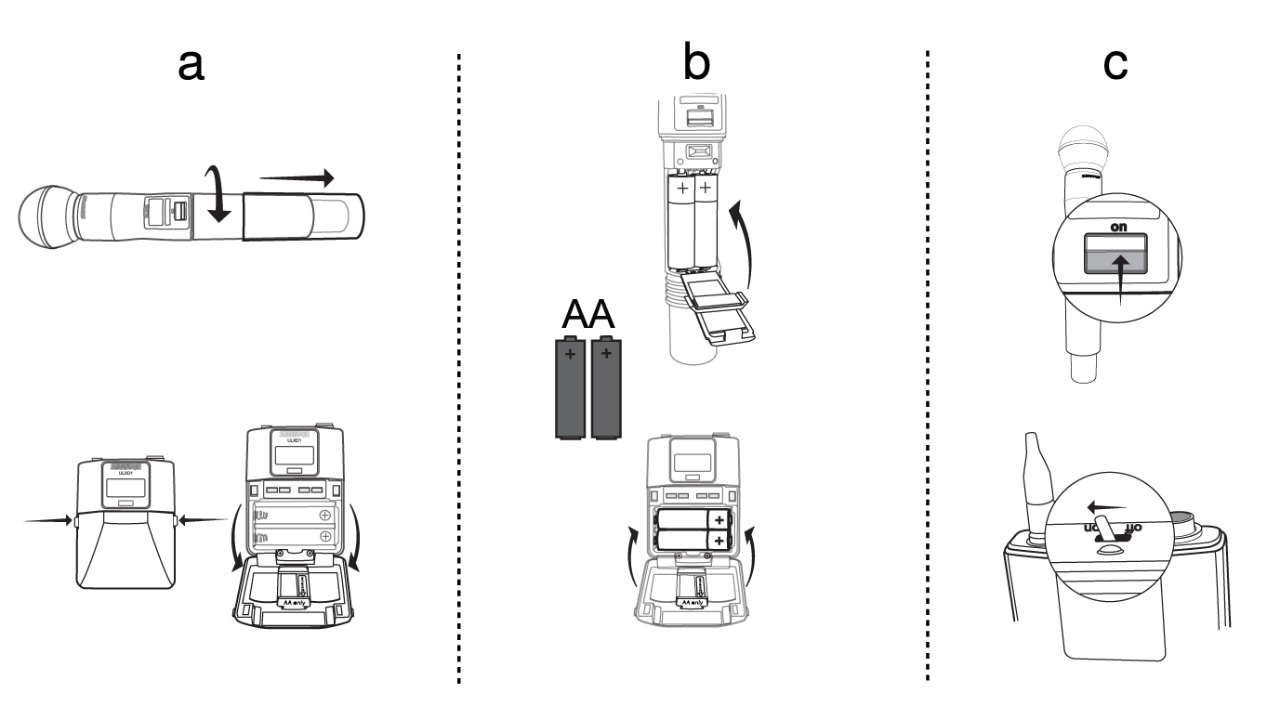
Microphone Batteries
- Fresh batteries can be found in the microphone drawer; They are wrapped in plastic
- Do not use loose batteries found in the drawer
- See diagram for battery replacement. The batteries in our microphones face the same direction (positive at the same side)
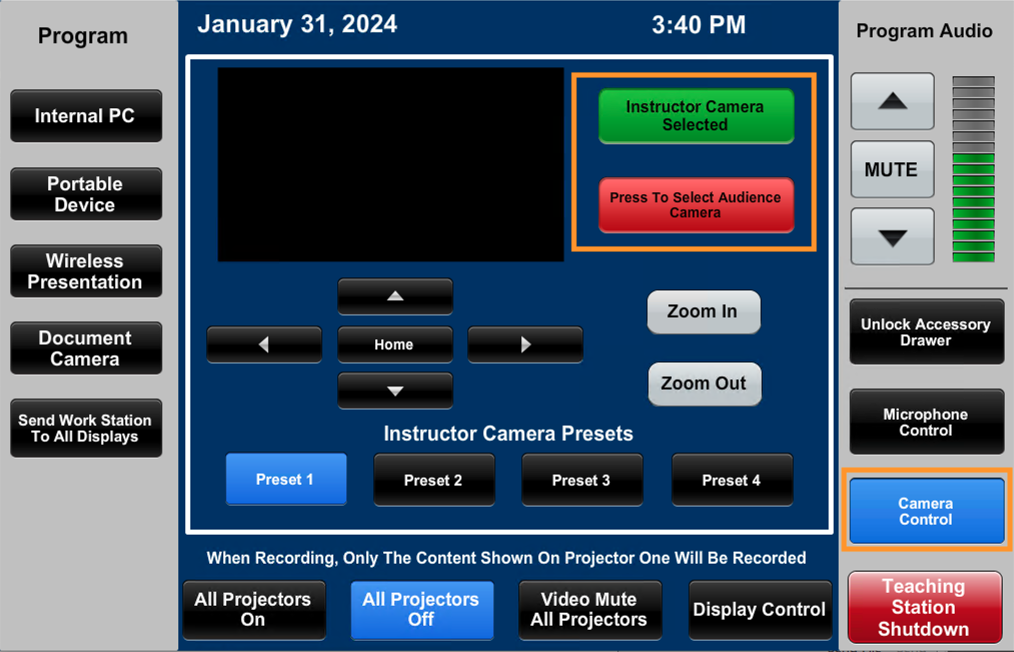
Camera Control
The majority of centrally classrooms have been outfitted with a camera to use for video conferencing or recording.
You can choose a preset camera shot or adjust the camera shot from the Crestron touch panel.
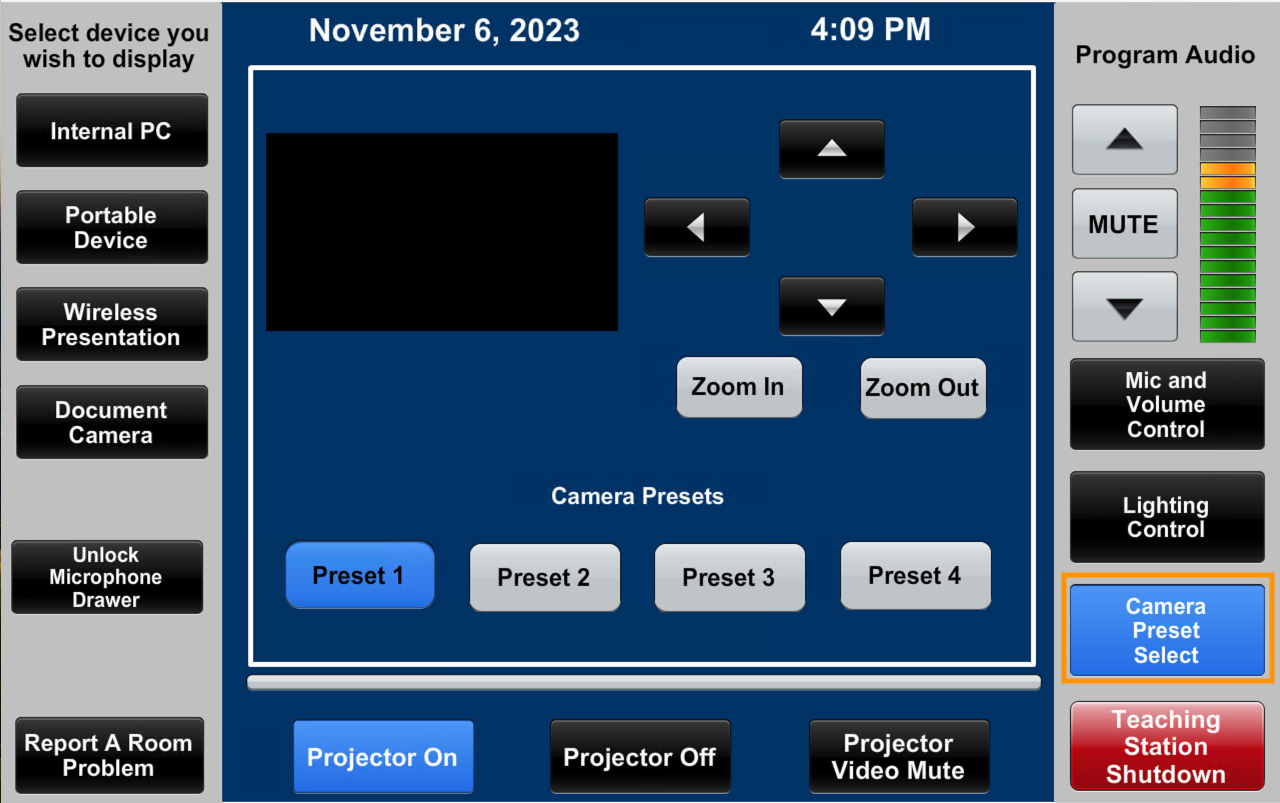
- Press Camera Control
- Choose a preset that works for you
- The preview window on the Crestron touch panel will show you the camera shot in real time.
- Use the arrow buttons to pan and tilt the camera
- Use the zoom buttons to zoom in and out
Note: The camera is slow to respond to the button presses on the panel. After making a single short press on a button, wait for the camera to respond before pressing the same button or another. Pressing too often or holding the button may cause the camera to swing/zoom too far.
If a classroom has more than one camera, the camera highlighted in green is the active camera. This camera will be recorded or used in a video conference.
Common Questions
Why is there no image projected?
Make sure the device you are using, such as the Internal PC, is powered on.
Make sure the projector is turned on with light coming out of it. Press the Projector On button if it is off. If the projector is on, press a different input, wait a few seconds and press the desired input.
Why can I see light in the projector lens but there is no projected image?
Check to see if the Projector Video Mute button is pressed or flashing. This setting will prevent the image on your device from being displayed on the large classroom screen.
Why isn't the microphone working?
Make sure the microphone is powered on. If necessary, locate spare batteries in the teaching station.
Why is there an image on the projection screen, but not on the teaching station monitor?
Make sure the monitor is turned on. Look for the power button on the lower right-hand corner of the monitor.
Need more help with technology at UB?
Contact the UBIT Help Center.