University at Buffalo (UB)
How to Export an Accessible PDF from Microsoft Word
Before You Export (Important!)
Before converting to PDF, make sure your Word document is already accessible:
- Use built-in Styles for headings (Heading 1, Heading 2, etc.)
- Add alt text to images, charts, and graphics
- Ensure tables have header rows and simple structure
- Use meaningful hyperlink text (avoid “click here”)
- Set the document language
- Run the Accessibility Checker in Word by going to Review → Check Accessibility
Step-by-Step: Exporting an Accessible PDF (Recommended Method)
Step 1: Open Your Word Document
- Open the final version of your document in Microsoft Word (Windows or Mac).
Step 2: Go to “Save As” or “Export”
- Windows
- Click File → Save As


- Mac
- Click File → Save As


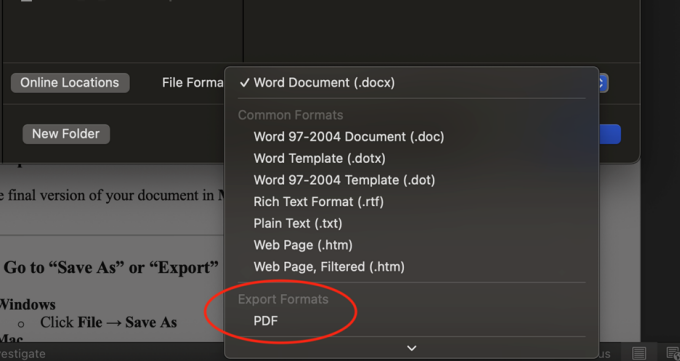
Step 3: Choose PDF as the File Format
- In the File Format / Save as type dropdown, select:
- PDF (*.pdf)
- Windows:


- Mac:

Step 4: Open PDF Options (Critical Step)
This step ensures accessibility features are included.
On Windows:
- In the Save As dialog, click More Options…
- In the Options window:
- Check “Document structure tags for accessibility”
- Check “Document properties”
- (Optional but recommended) Check “Create bookmarks using headings”
- In the Options window:
- Check “Document structure tags for accessibility”
- Check “Document properties”
- (Optional but recommended) Check “Create bookmarks using headings”


On Mac:
- When PDF is selected as the export format, make sure you select “Best for electronic distribution and accessibility” below the format box


Step 5: Save the PDF
Click Save on Windows.
Click Export on Mac.
Your PDF is now exported with:
- Tags
- Reading order
- Headings
- Lists
- Table structure (if properly built in Word)
Optional but Strongly Recommended: Verify the PDF
Step 6: Check the PDF in Adobe Acrobat Pro
If available:
- Open the PDF in Adobe Acrobat Pro
- Select All tools → Prepare for accessibility
- Run Accessibility Check
This helps confirm:
- Tags are present
- Headings are recognized
- Images have alt text
- Language is set